Craig Pindell, Fine Art Photographer
All work copyright Craig Pindell, 2026
Photographic Light Meters and Metering for Success
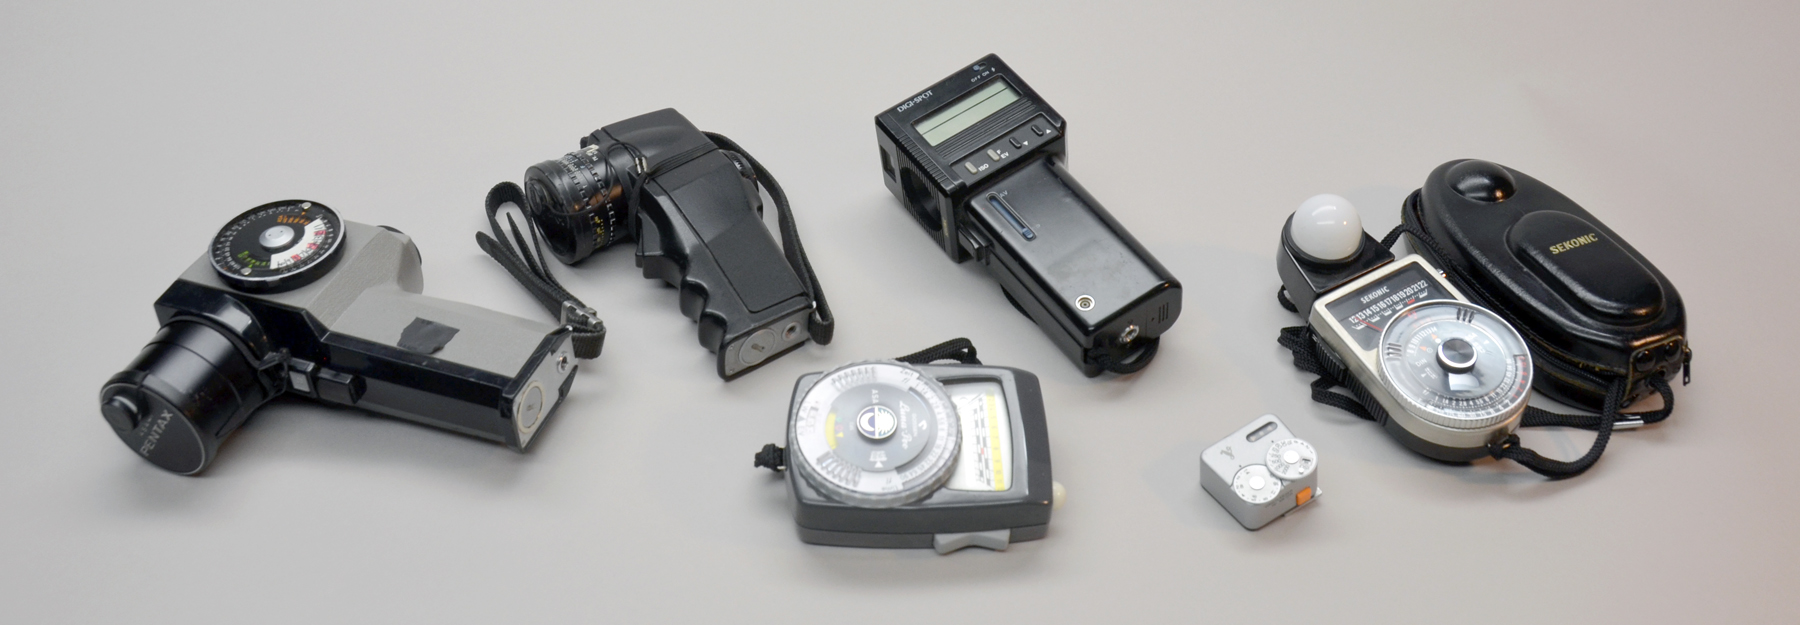
The light meters I use most often. 3 spot meters, a reflected light hand held meter, and incident meter, and a shoe mount reflected meter.
A well functioning light meter and the ability to understand what the light meter is indicating can make the difference between a successful photograph and a snapshot. Some meters work better for some types of photography than for other types of photography. Some meters are much easier and quicker to use than others, and can be very efficient and reliable, if you know how to use them.
Before going any further, I know some folks will say that metering is a waste of time. Some say that metering interferes with spontaneous photography - just use the Sunny 16 rule, it is close enough. Some say that metering does not make sense; or that the camera meter is more than adequate. If those are your arguments, this article will probably not be of much use to you. I do not profess to be the know it all of photographic metering and exposure. My intention is to share with the reader what I have learned and what I have experienced. I know that a properly exposed negative is much easier to print than a poorly exposed negative. I know the feeling you have when you make a fantastic photograph only to see the negative come out of the wash, and the poor exposure renders the negative difficult or unusable.
The first thing to know is that every light meter measures middle grey, aka 18% grey, aka Zone V. The meter measures nothing else. The meter doesn't know if it is metering shadows or highlights. It measures whatever you point it at, and tells you the exposure required to render that target as middle grey. Once that measurement is made, it is up to the photographer to make the correct exposure adjustment to render the scene or object you are photographing as you see it.
Different meter styles are used differently. Spot meters measure reflected light in a defined selective area. Incident meters measure the light striking the dome or disc of the meter, which works fine if the meter and the subject are receiving the exact same amount of light. Reflective meter usually measure a larger area (up to 30 degrees or so) and average the reflectance in the measured area. I use each of these types of meters for different situations. I have learned when each type works best for me, and how to handle having the less than optimal meter in different situations.
Spot Meters
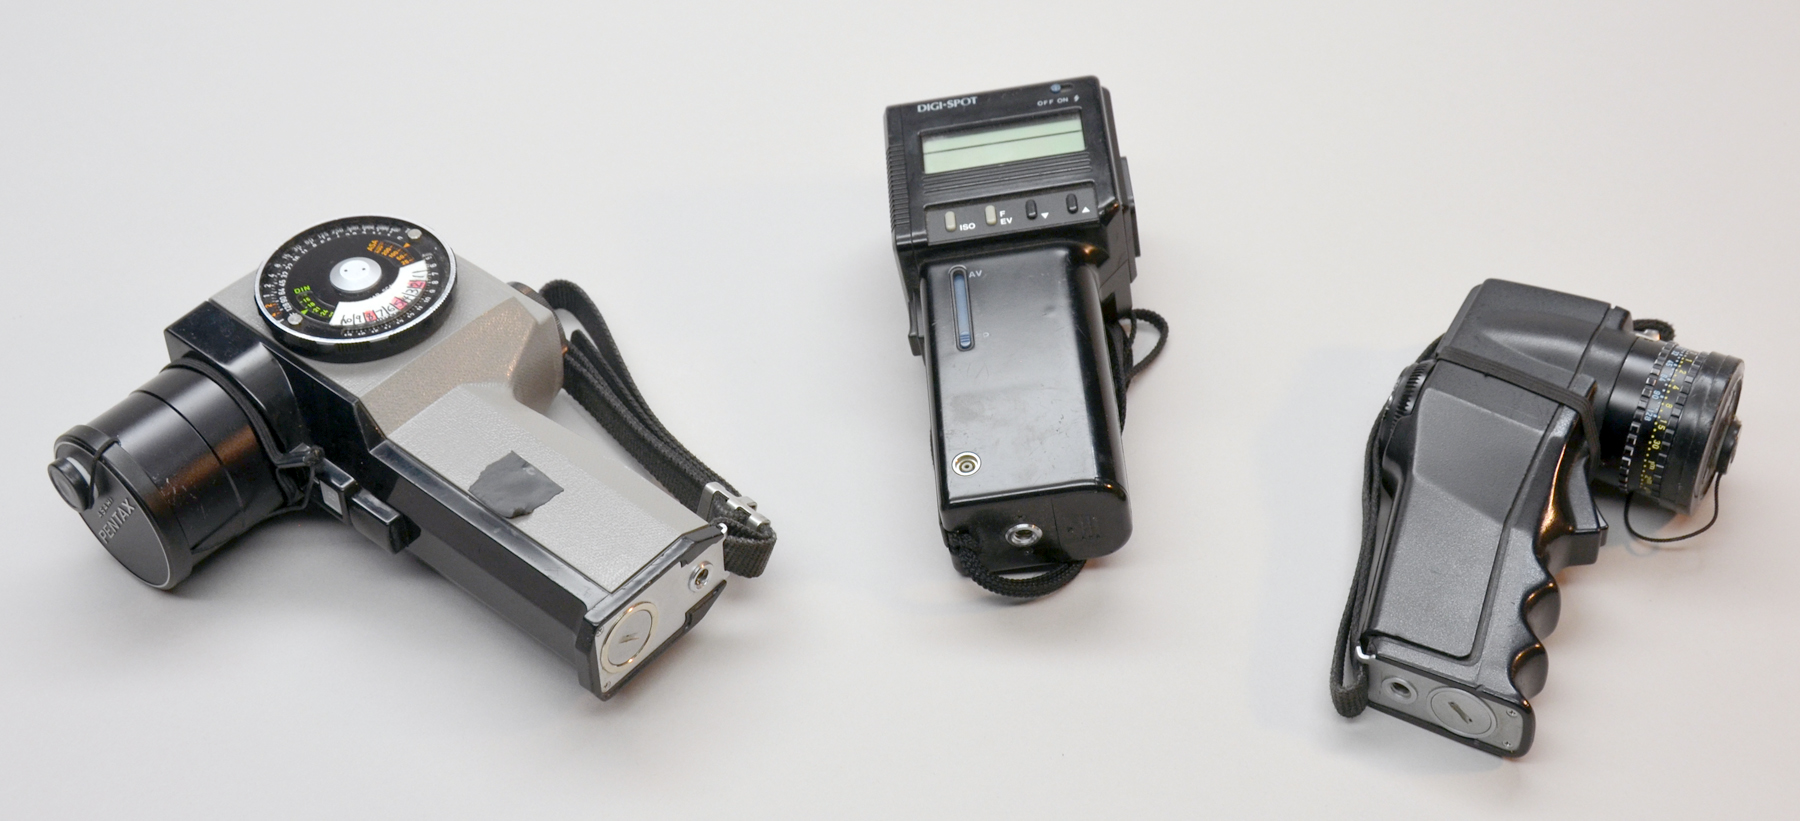
My three spot meters - Pentax Analog, Sekonic Digi Spot L-488, Pentax Digital
I have three spot meters, not because they differ in capability or performance, but because they live in different camera bags with particular cameras. The Sekonic Digi Spot L-488 was the first spot meter I bought, and it is still my favorite. It works in lower light than either of the Pentax spot meters. It has been very dependable and it stays in my 4x5 camera pack. I found early on that when I tried to use one meter for all camera systems, the meter was usually in the camera bag that had been left home that day. The Pentax analog spot meter is the heaviest of the three, and it works well with my medium format systems. The Pentax digital spot meter is very light and the led lights are easy to see, even in bright light. It was a gift from a close photographer friend that was quitting 8x10 photography, so it went in the 8x10 camera pack and it stays there. It has been modified by Zone VI, but I am not sure that makes it work any better. I have compared it to my spot meters, and to the spot meters of other photographers, and it seems to read about the same as all of them.
To be honest, I would not use any of these meters if it were not for the Zone system scales installed on each of them. I am no engineer, and it seems like when I was trying to make calculations in the field for shadow zones and highlights zones, that I was wrong as often as I was right. When metering is that challenging, it soon takes the fun out of making images. When I found the first example of the Zone calculator on a light meter, it was on a Pentax Analog meter. I did a bit of pondering, then stole the idea and adapted it to my Sekonic meter. That scale is still the scale that is on the meter now. I suspect the scale is more than 20 years old. When I acquired the Pentax analog spot meter, I made the scale and put it on the meter before I ever took it into the field. The Pentax digital spot meter came with the Zone VI scale attached.
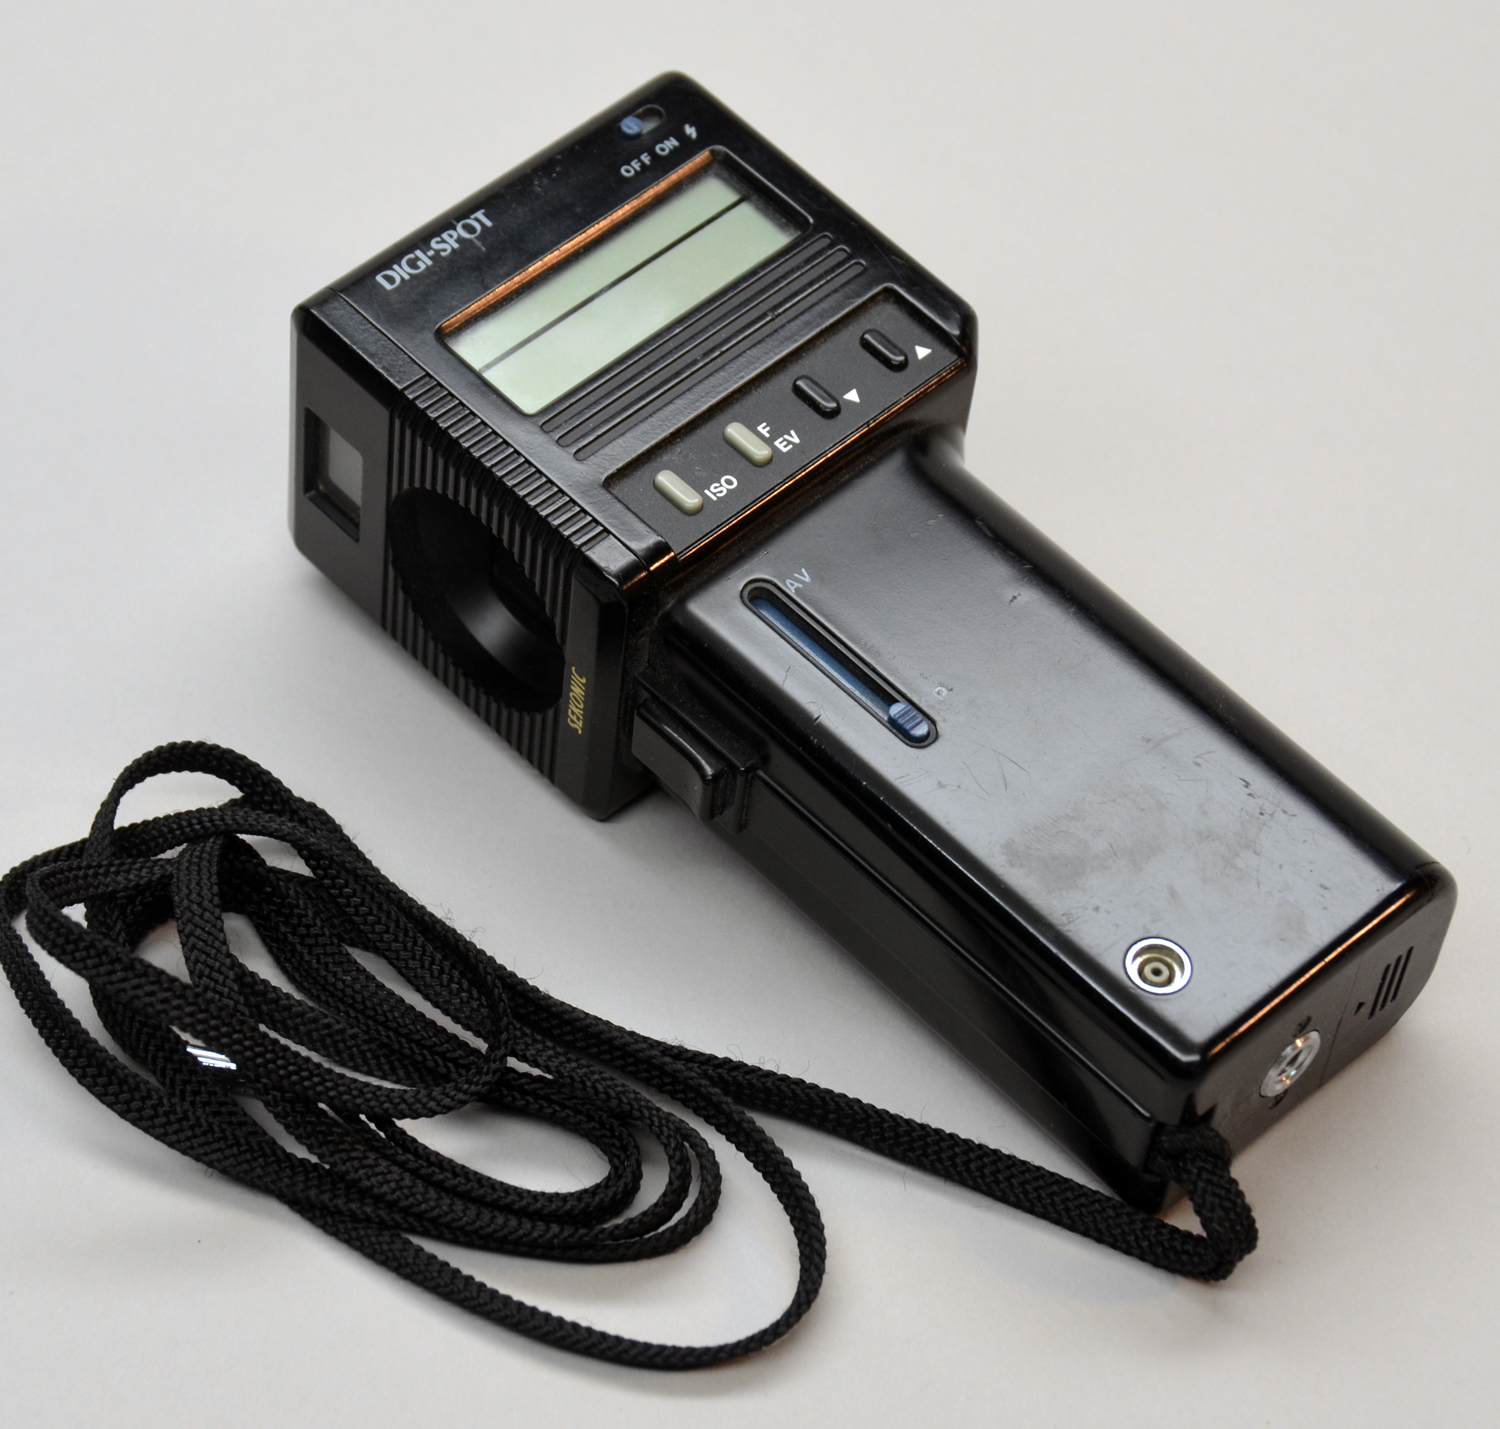
Sekonic Digi Spot L-488
 |
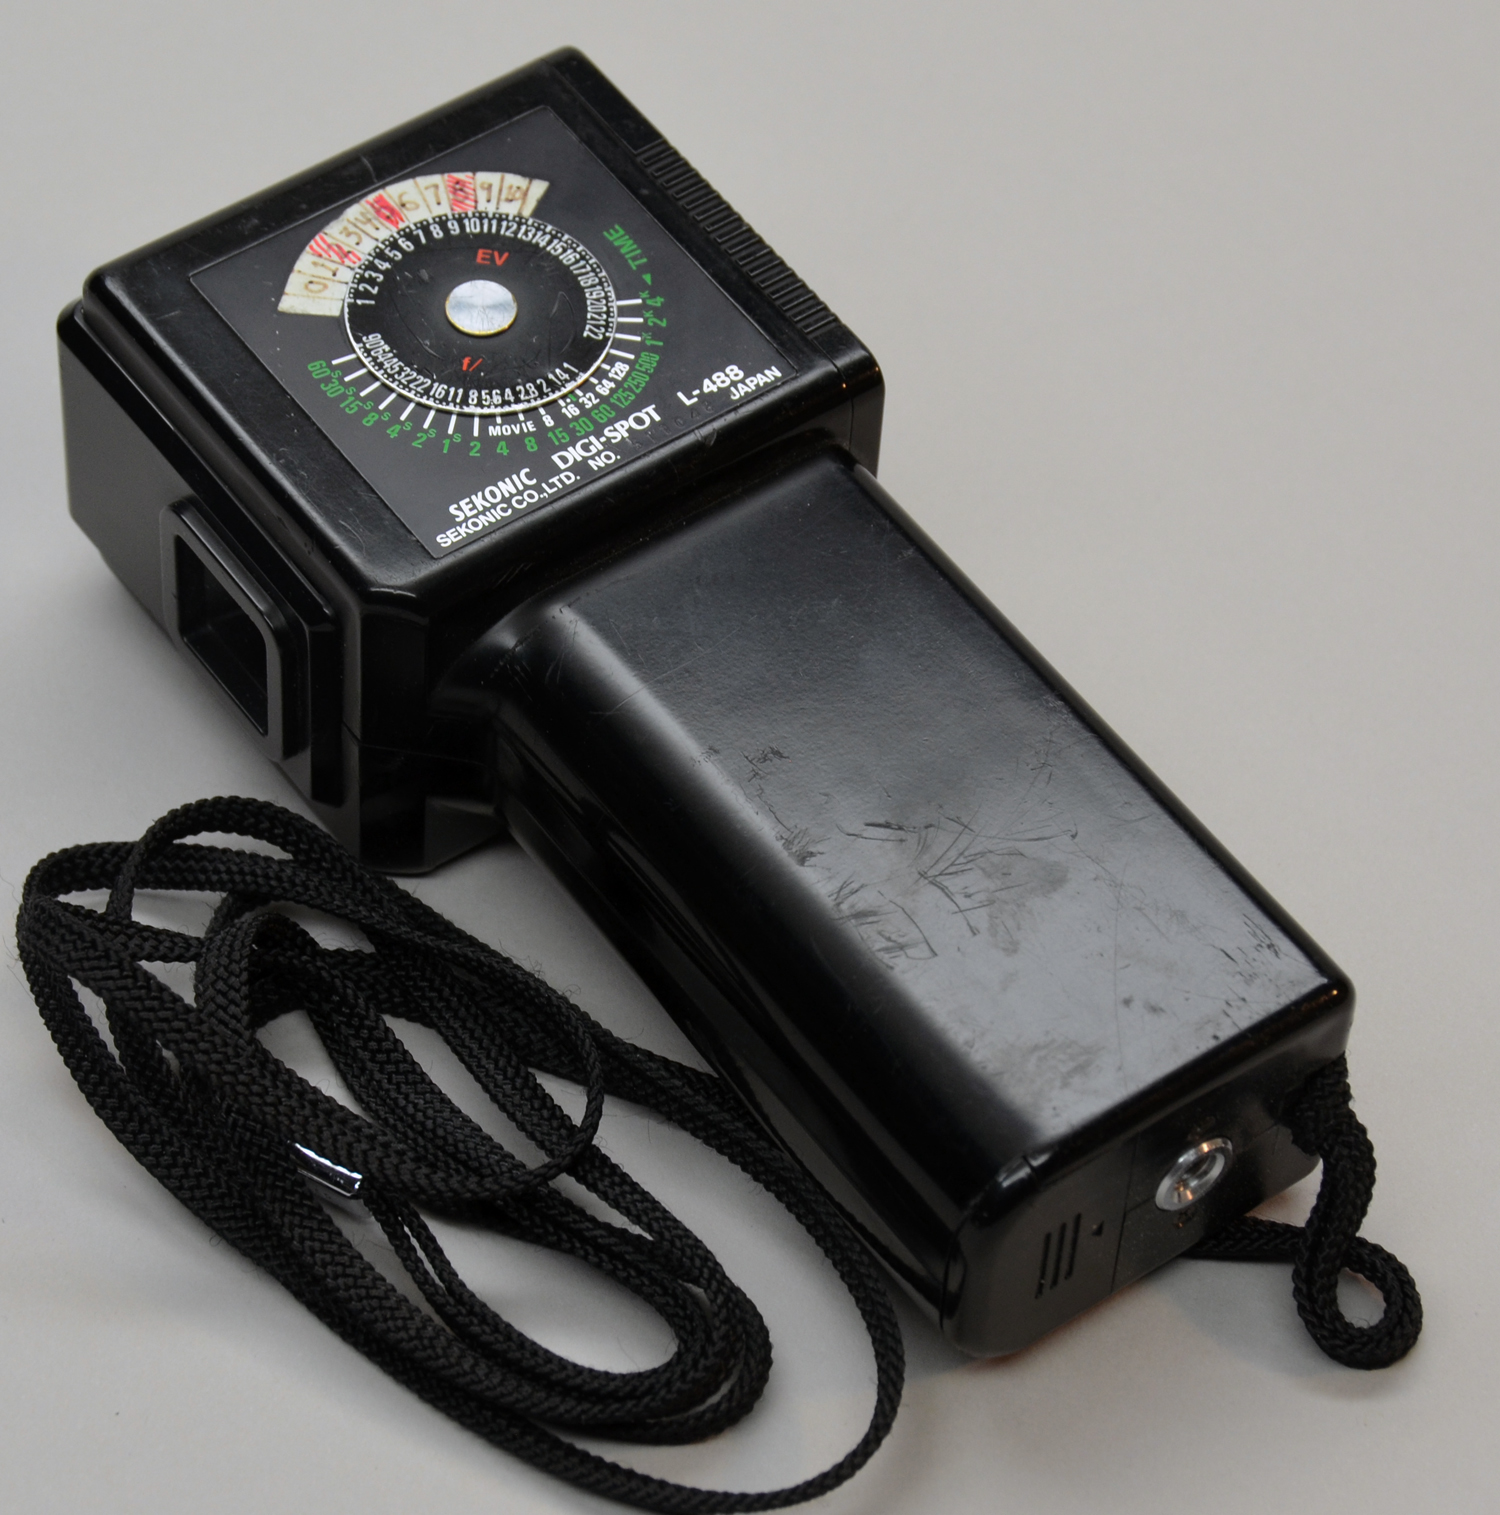 |
My Favorite Spot Meter
The Sekonic L-488 is a terrific light meter that I have used for many years. It is robust, and easy to read, even in low light. It has option to measure a 1 degree spot, or an average, which is about a 30 degree area, I believe. Until I learned how to apply the Zone system to transparency film, I used the average function for transparencies. I now use this meter only in the spot mode.
The metered EV can be read looking through the meter, or on the left side of the meter after making the reading. The EV is used on the dial on the right side to determine the correct shutter speed / aperture combination. By adding the Zone system graphic to this meter, I made it very quick for me to read the shadow area EV, place that number on Zone III 1/2 to Zone IV. That determines my exposure. I then read the textured highlight EV and compare that to Zone VII 1/2 to Zone VIII. If the EV is below Zone VIII, The negative gets a plus development. If the EV is above Zone VIII the negative gets a minus development. The amount of plus or minus development is determined by the number of Zones difference. For example, if the EV falls at Zone X, I would give the negative an N-2 development. In Ansel Adams terms, this is "Expose for the shadows, develop for the highlights". It works for me.
One quirk of this meter is that the front lens of the meter is very close to the front of the meter, so there is not much protection for it. I have never scratched it, but it is prone to flare, if I don't use my hand or my hat to shade the meter when I am taking measurements. Not addressing the flare can cause a stop or more error in metering.
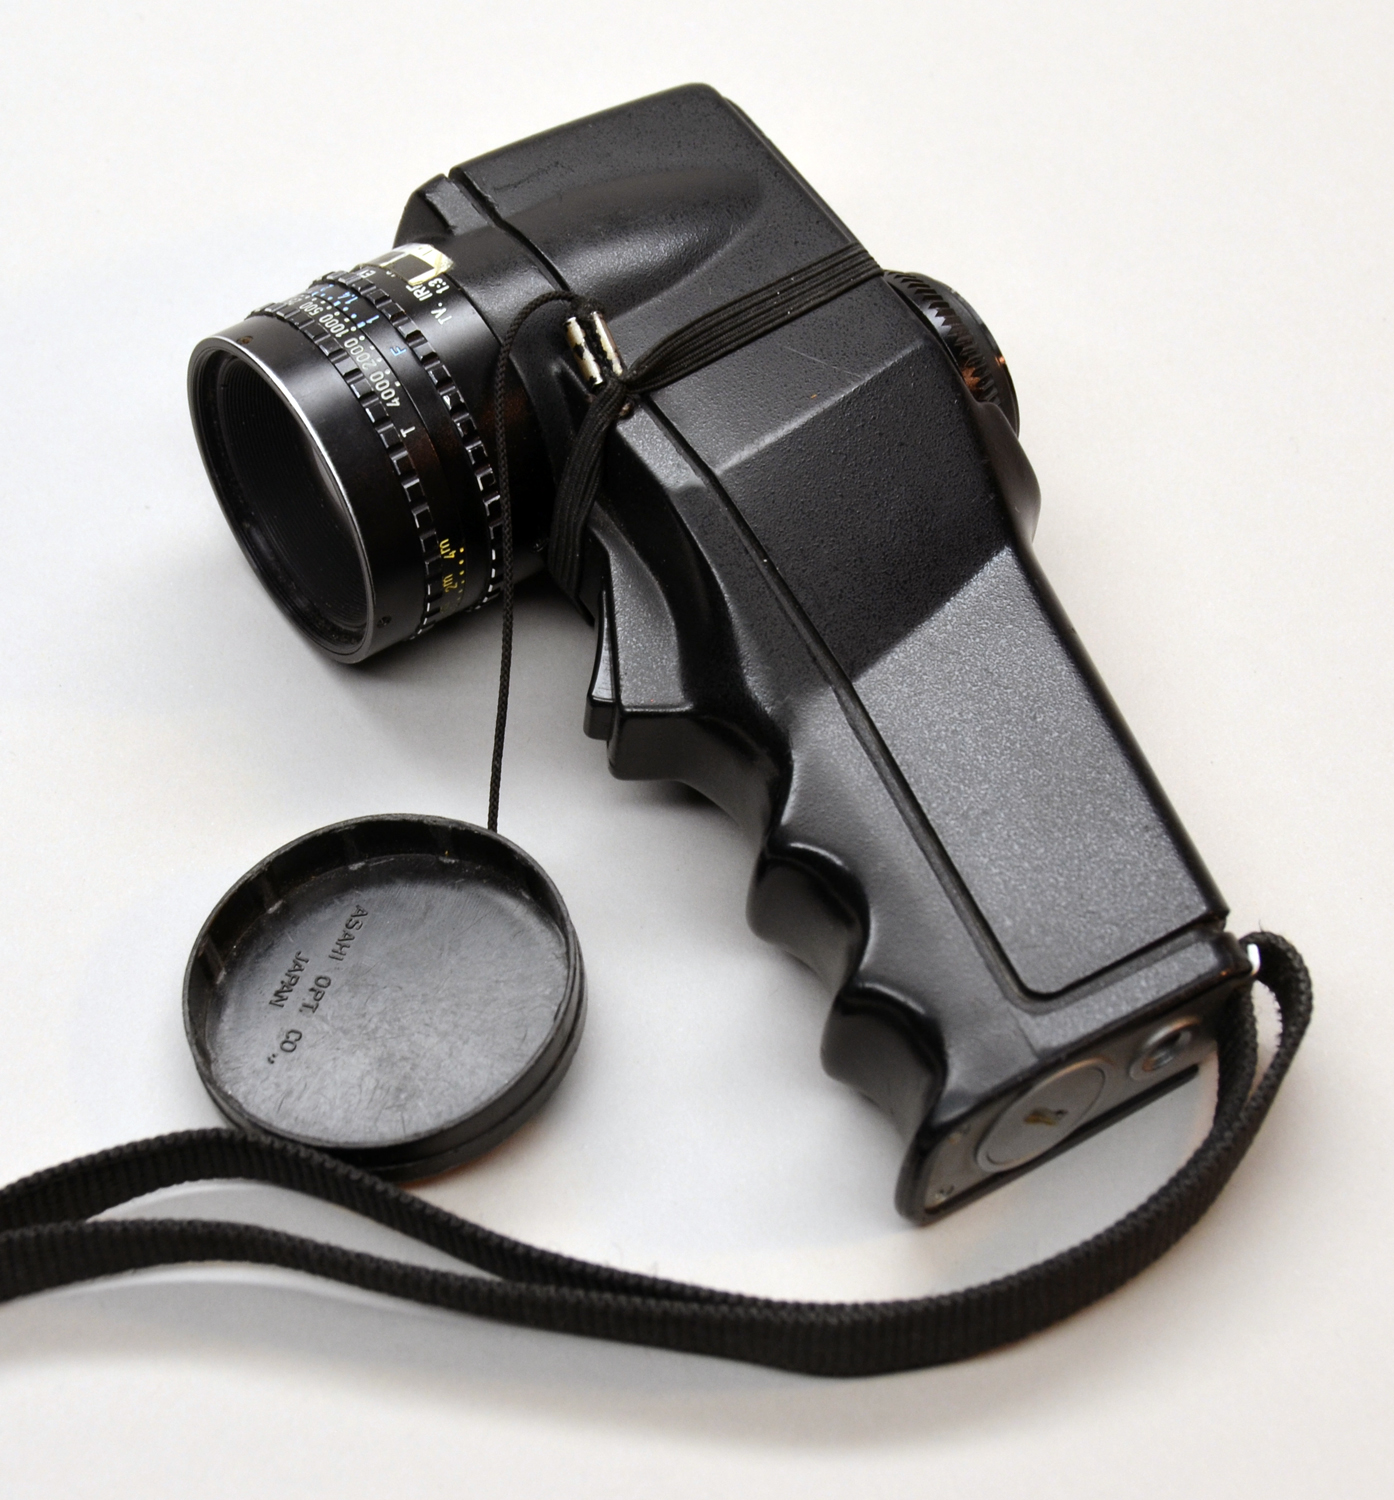
Pentax Digital Spot Meter
 |
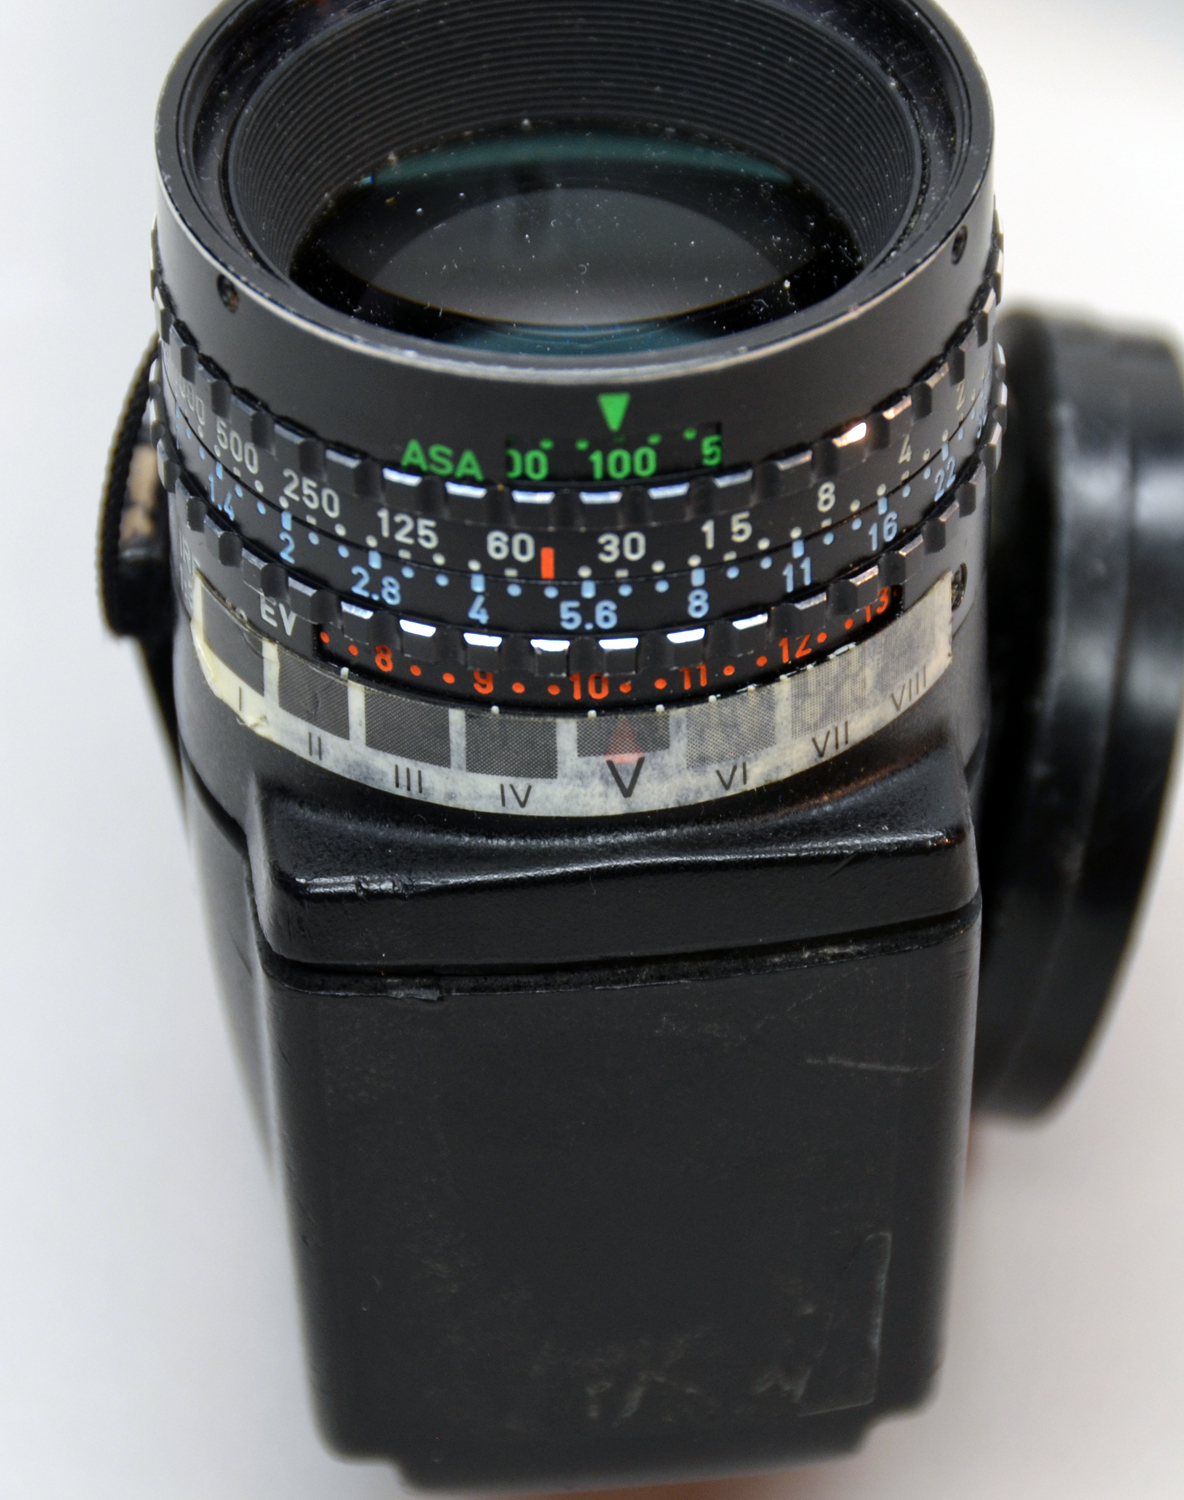 |
This meter is nearly as light as the Sekonic meter is is every bit as accurate. It has been modified by Zone VI, which was a popular choice back in the day. During my use of this meter, I have not seen a noticeable improvement over the other spot meters. The Zone VI zone scale is easy to use, and looks a bit more tidy than the scales I made for the other two spot meters. The red internal LEDs are easy to see in very low light.
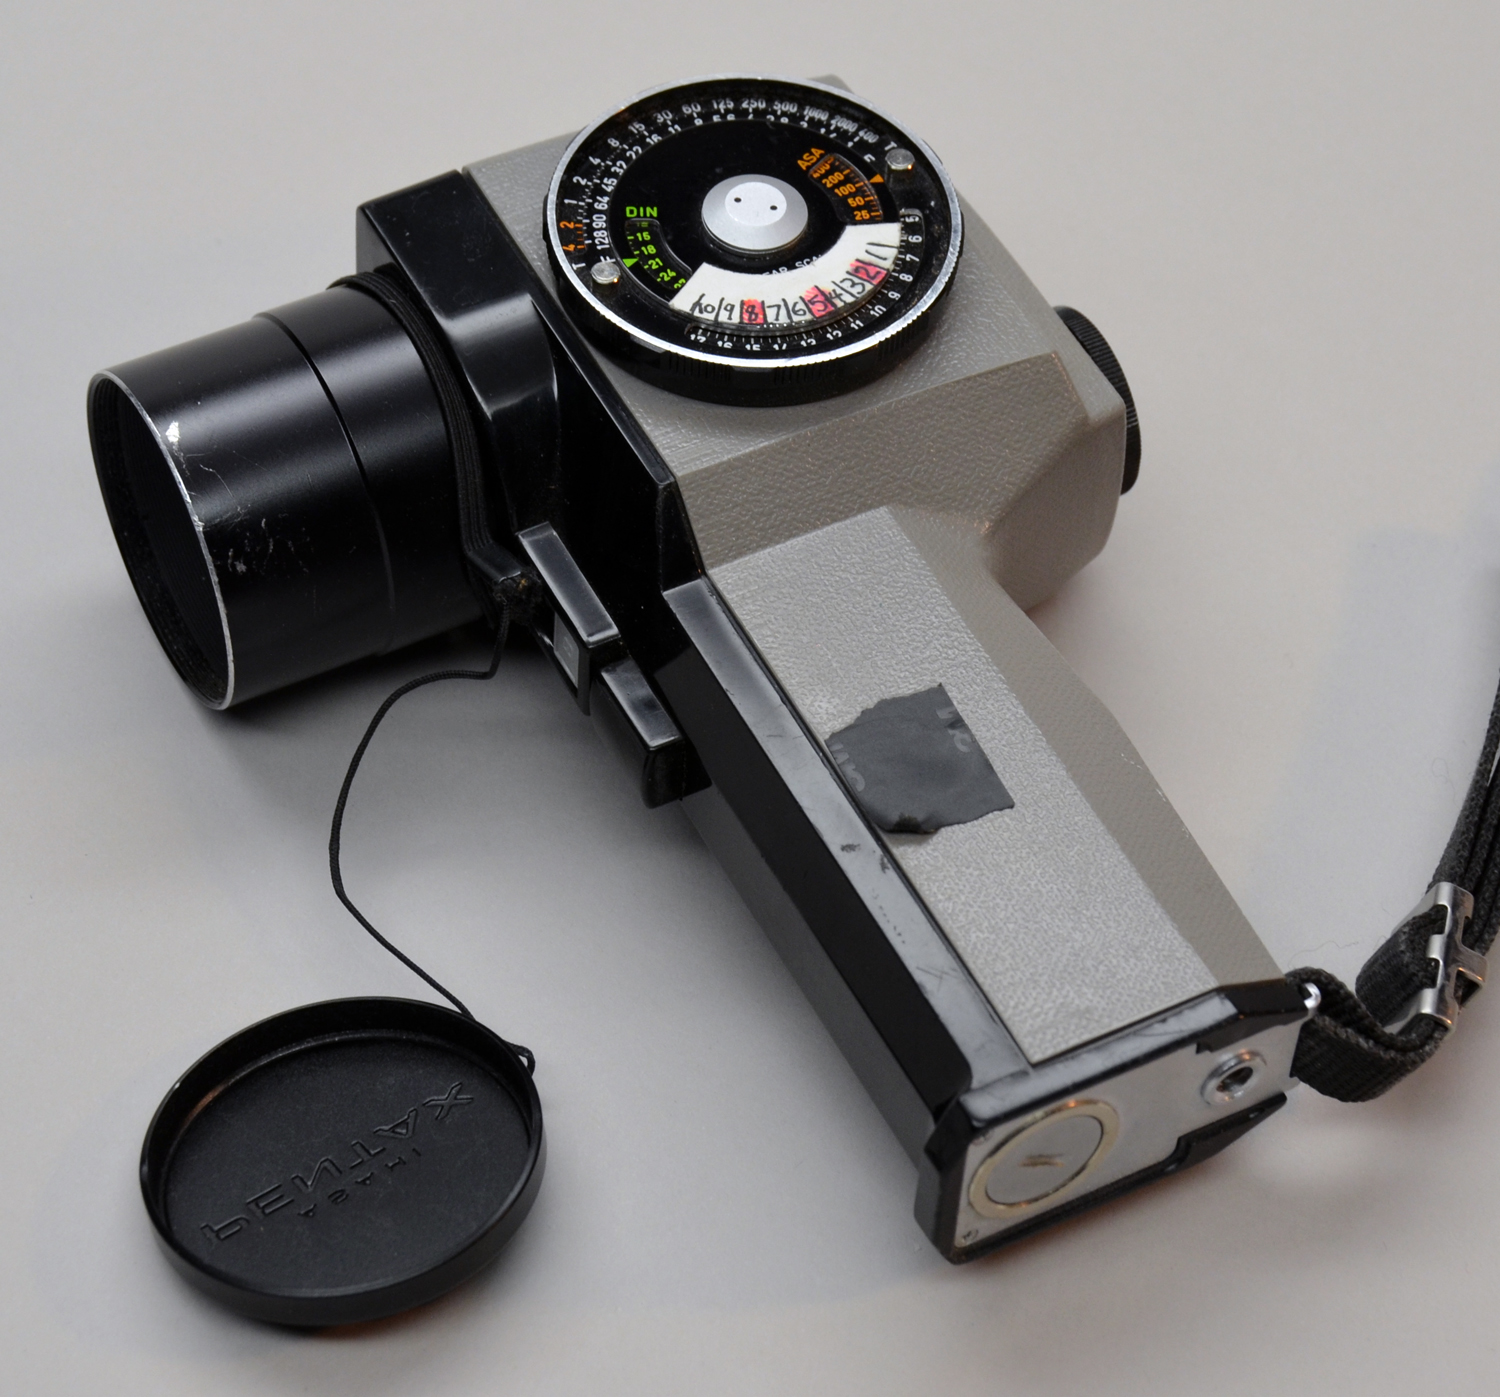
Pentax Analog Spot Meter
 |
 |
The Pentax Analog spot meter is heavier than the other two spot meters but is a very reliable and accurate meter. The sweep needle is a bit more difficult to see in very low light, but is excellent in most other situations. It is very similar to the Sekonic for ease of use, and the scale I made for the dial is even easier to read without reading glasses for me.
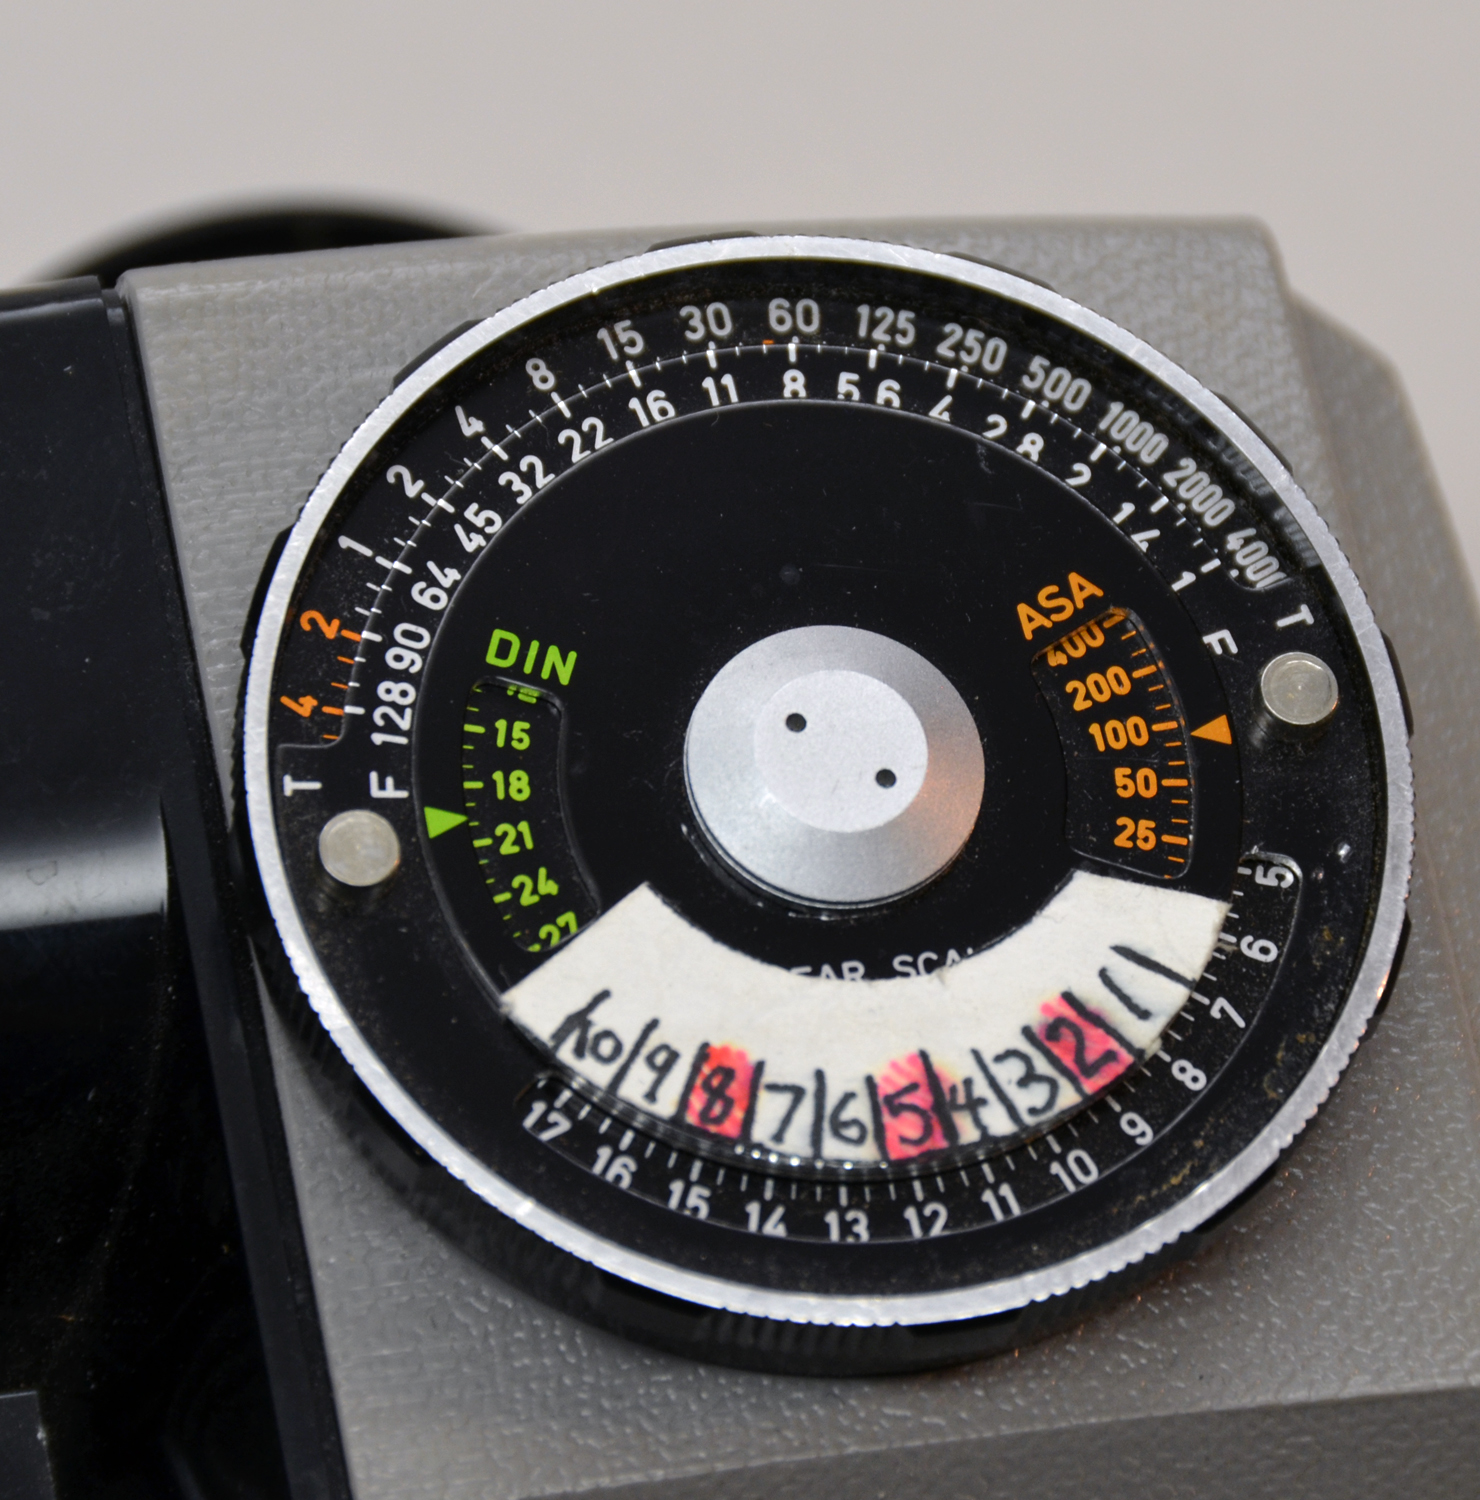
Gossen Luna Pro
 |
 |
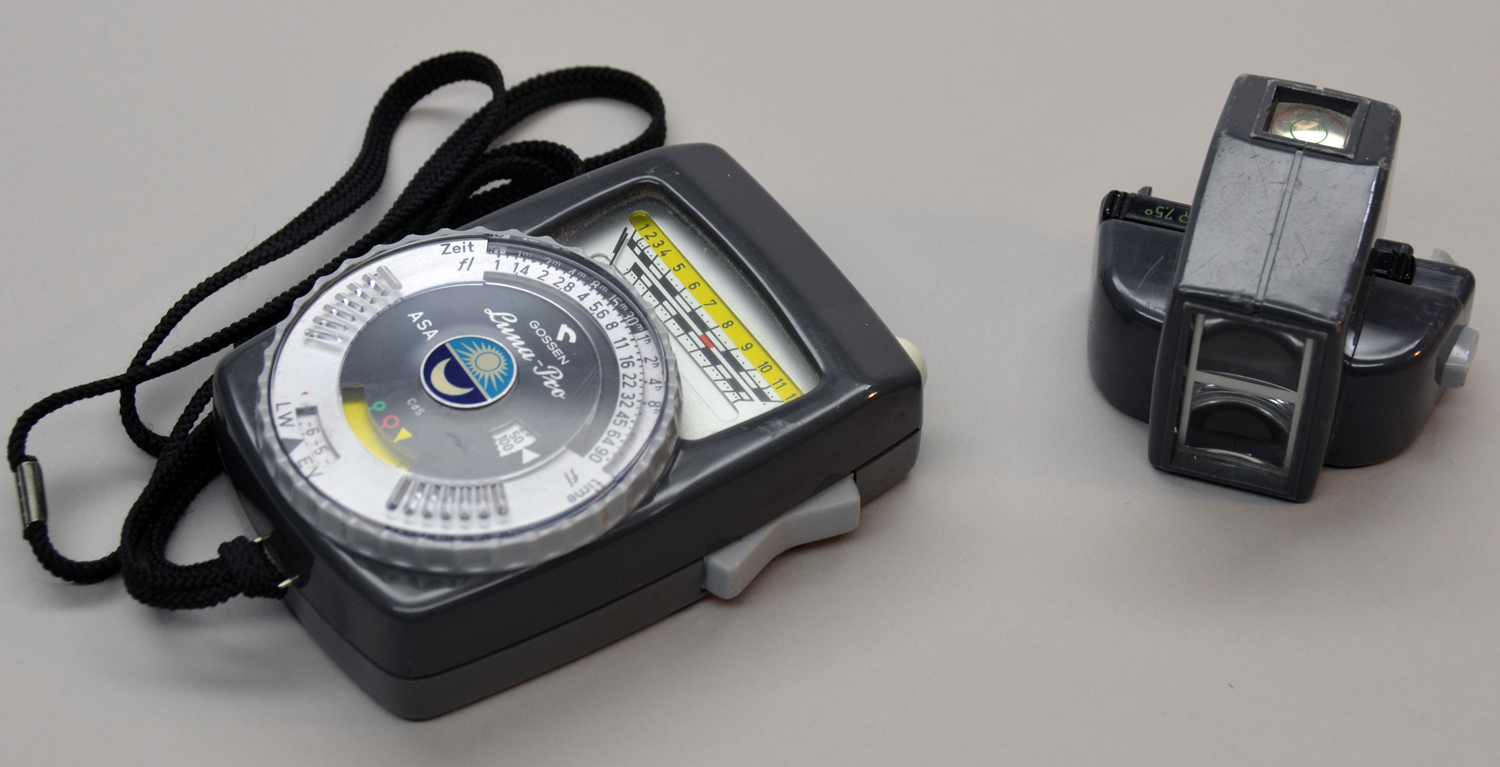
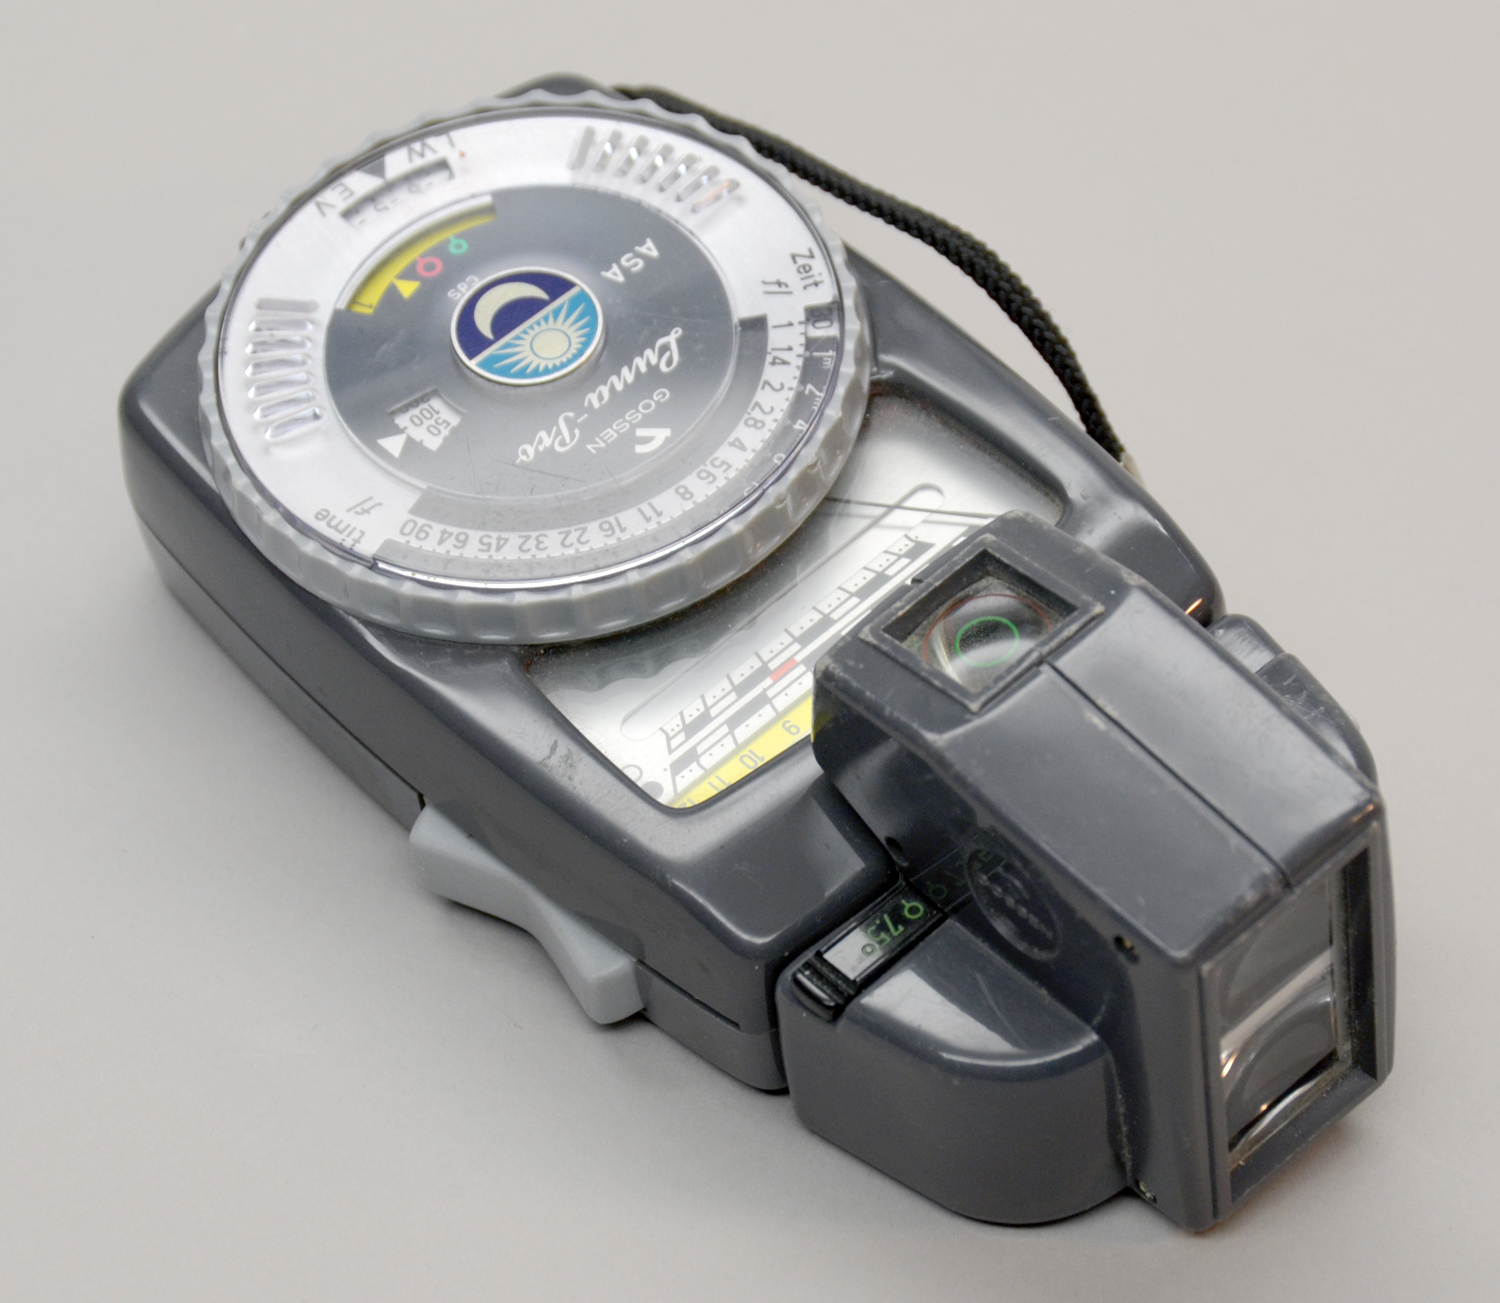
Gossen Luna Pro with Spot Meter Attachment
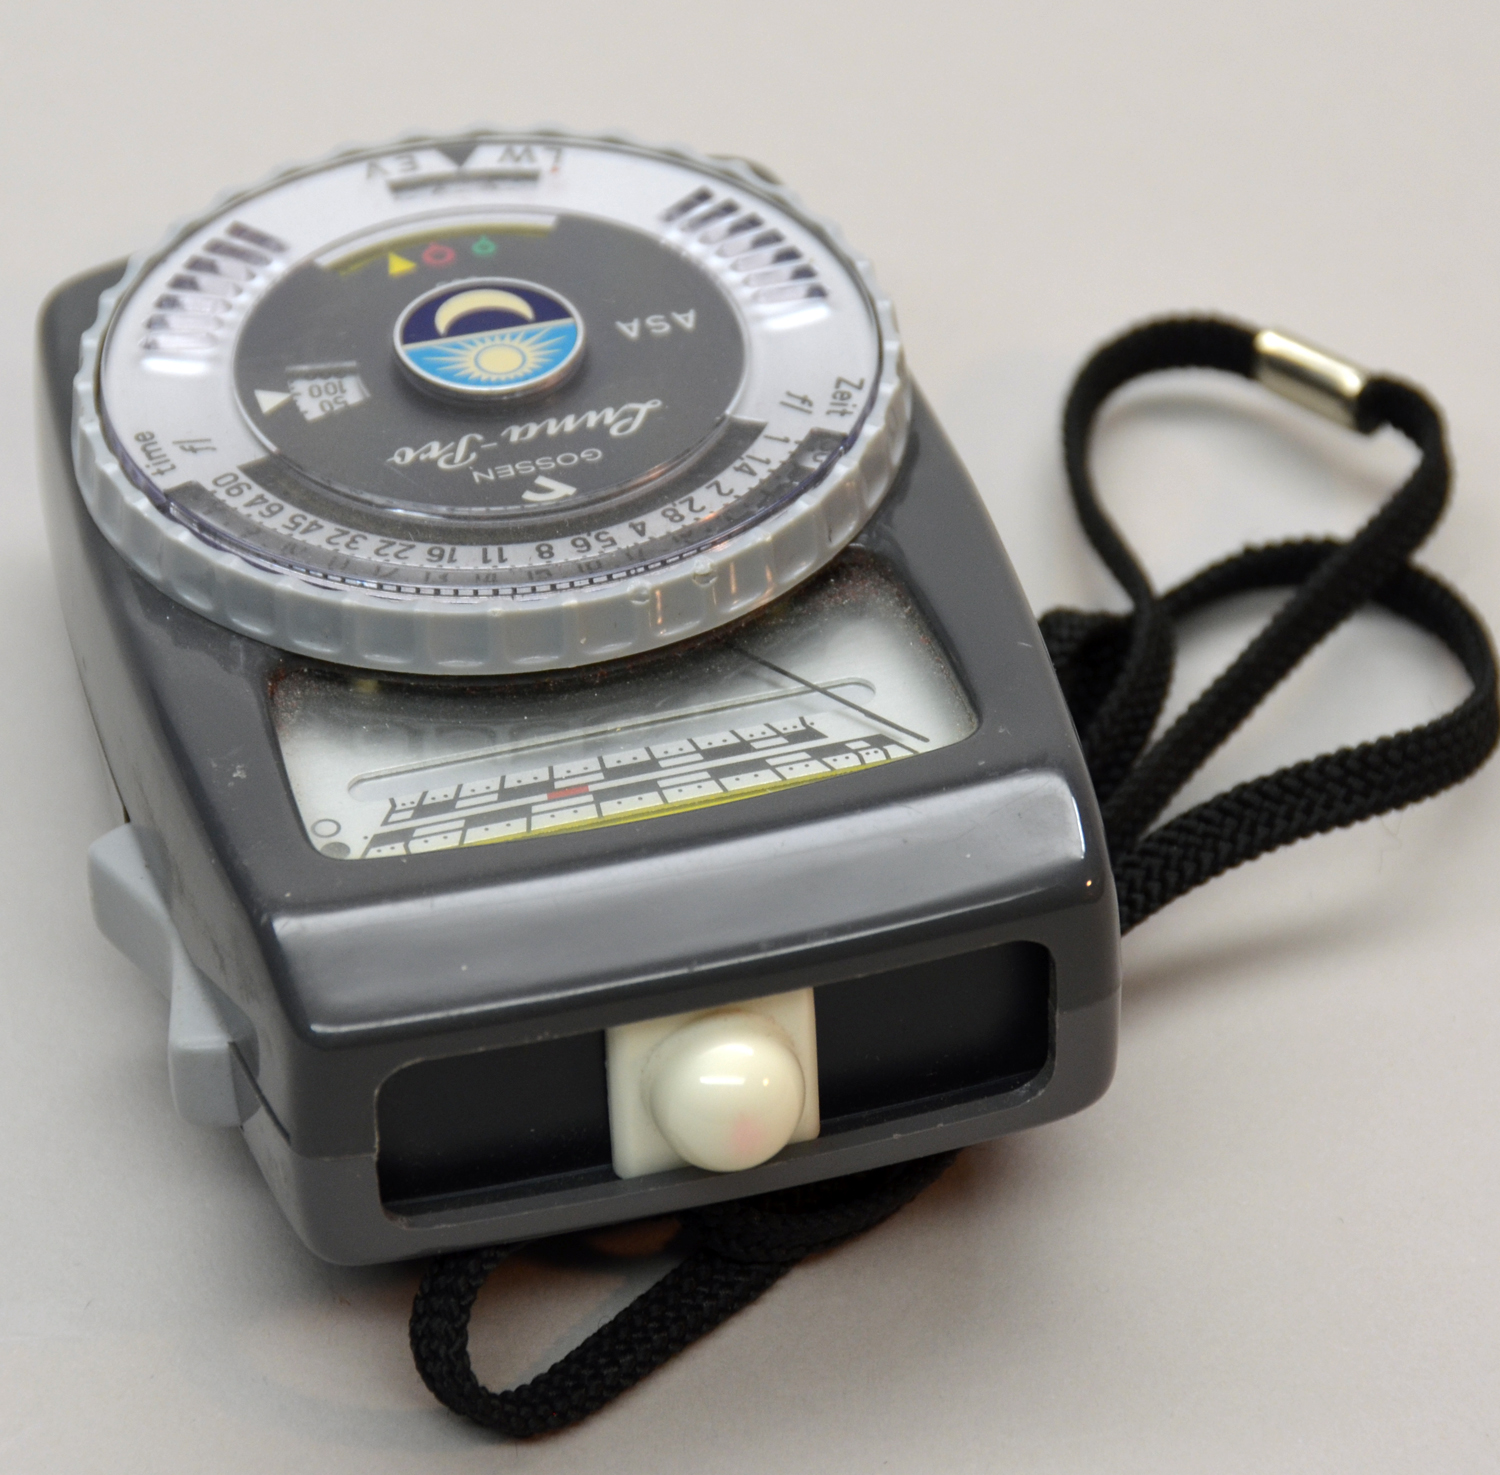
The Gossen Luna Pro is the first hand held light meter I purchased, over 40 years ago, and it is still as solid as the day it was new. This meter is terrific for one hand use. It is very versatile, with the ability to make reflected measurements, incident measurements, and spot measurements. Besides having a strong sentimental attachment to the meter, I have known I can depend on the meter since I bought it.
As with any meter that measures a large area, (30 degree angle of measurement) the user has to be aware of the area being metered. Too much sky can lead to underexposure, too much shadow can lead to over exposure. With a little bit of practice this meter can do every bit as well as meters that cost much, much more.
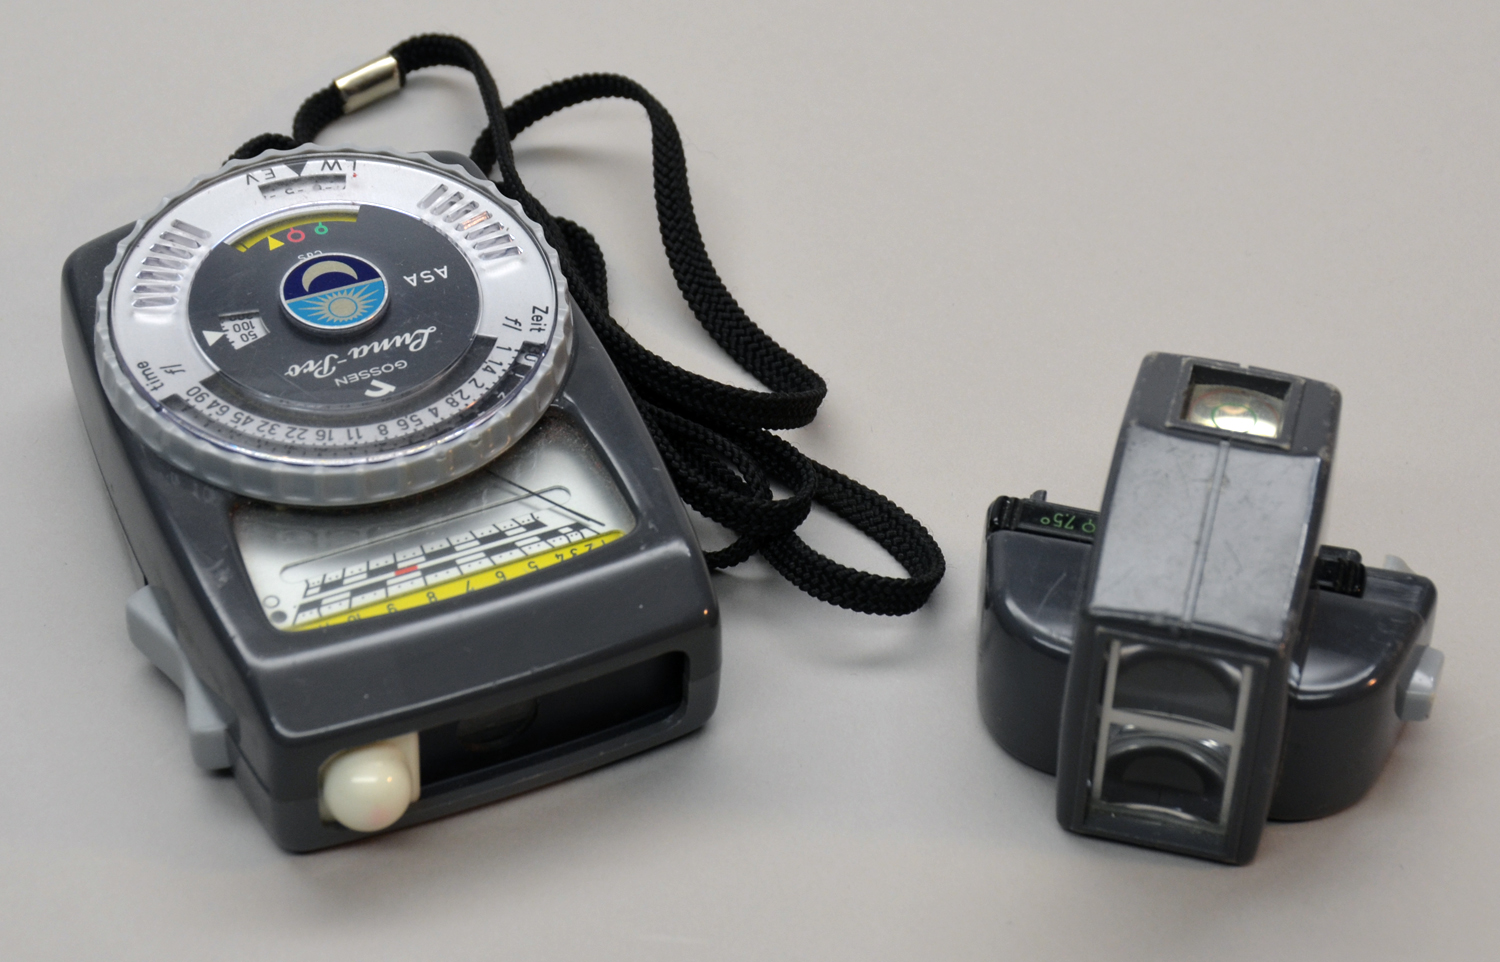
Gossen Luna Pro Meter with Incident metering sphere in position for use
One of the advantages of the Luna Pro is the Incident metering ability. The white sphere is always attached to the meter, so it never gets lost and is ready when it is needed. Before I started using spot meters, I would first meter with the reflected mode, then double check myself with the incident mode.
When I was doing mostly portrait photography, I used the incident mode most of the time. I could meter from the subject toward the light source, and I was sure of proper exposures every time.
Gossen Luna Pro with Spot Meter attachment in place
In the mid 1990's I was on a workshop with Bruce Barnbaum in Antelope Canyon, and Bruce was working with each of the participants as we photographed in the canyon. Once he got all of us working on making our own photographs, he set up his 4x5 and started making a photograph for himself. I had finished with the image I was making so I hung out to watch Bruce in action. Once the camera was situated and focused, he pulled a Luna Pro with a spot meter attachment from his pack. Everyone else was using expensive 1 degree spot meters, so I was surprised he was using the "lesser" meter. At dinner that night I asked him about it, and he explained that the 7.5 degree spot was small enough for his work, and that the Luna Pro was very robust and dependable.
It took me a few months and I finally found a used spot attachment, so I tried it for a while. It works well, but I preferred my Sekonic 1 degree spot, mostly because of the Zone system scale I made for it. I suppose I could figure out a way to add a scale to the Luna Pro, but I have not done it, so I seldom use it as a spot meter. Also, the spot attachment is a bit bulky, and when the spot meter attachment is attached, the protective case doesn't fit.
Sekonic L-428
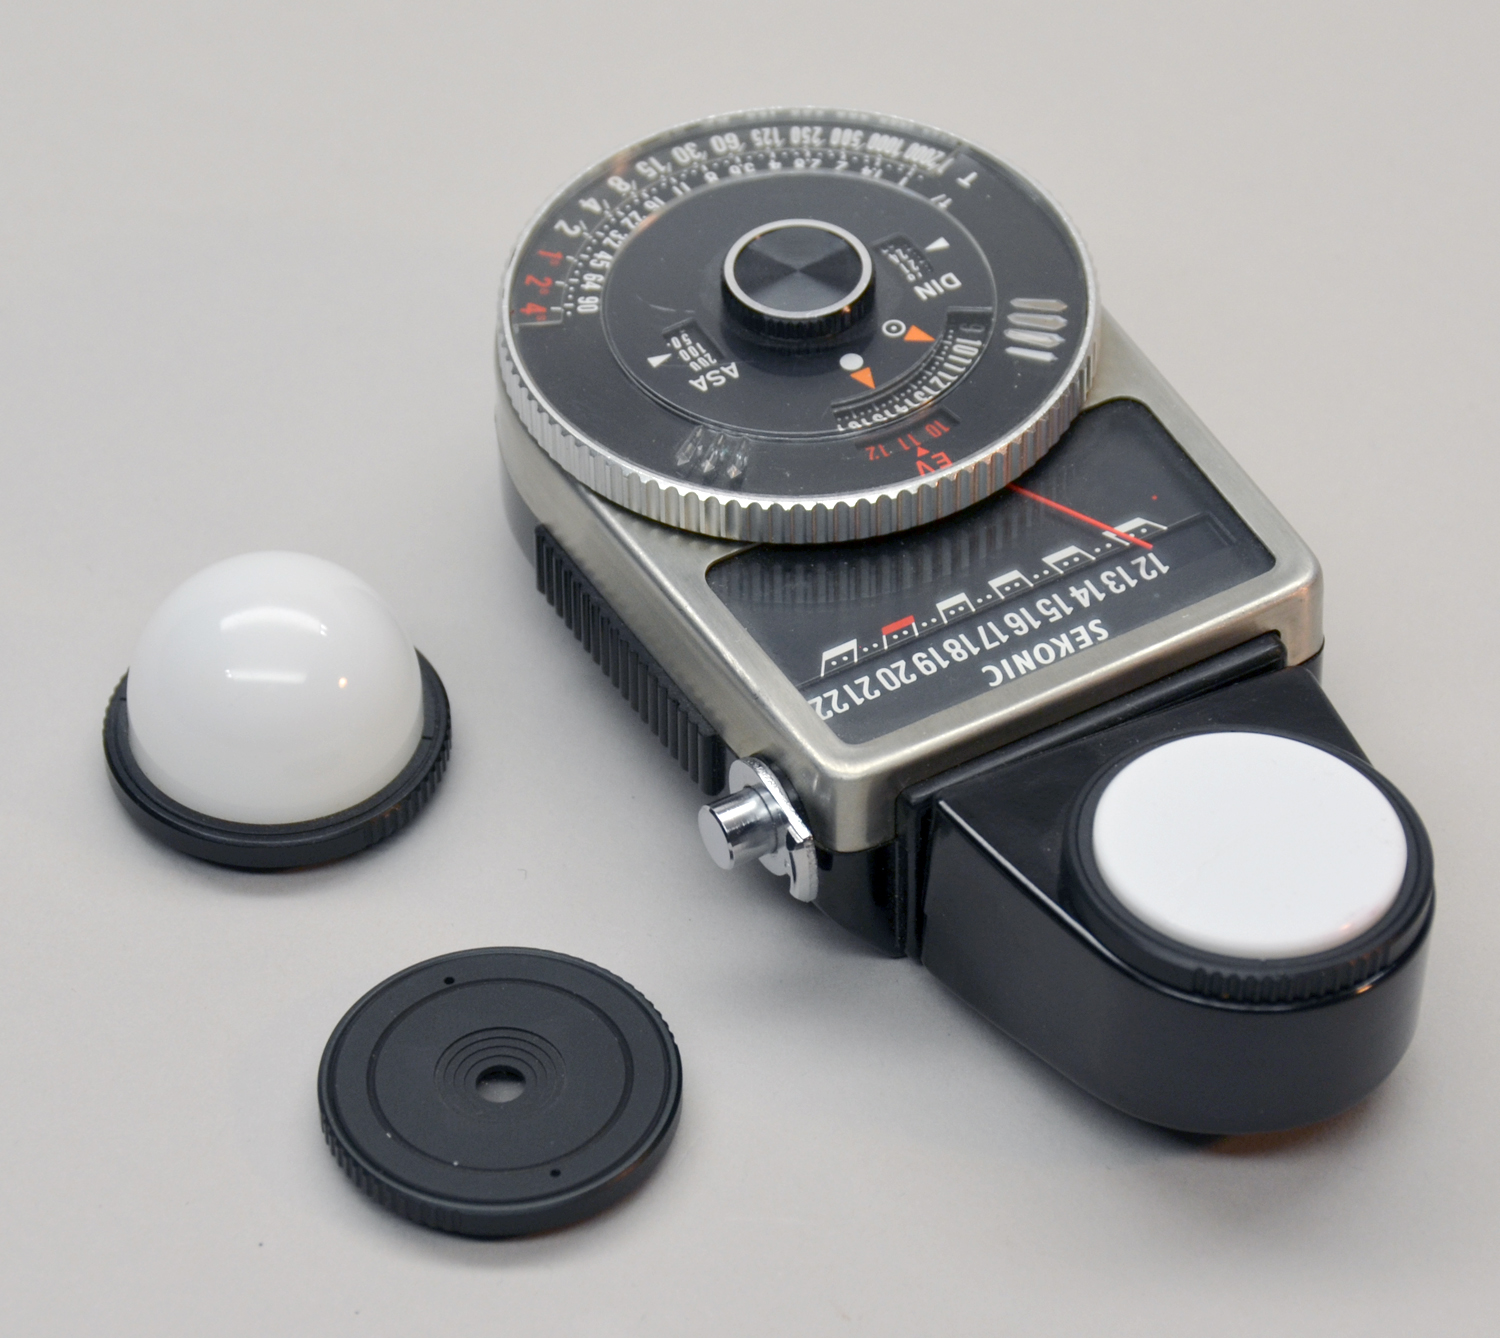
This Sekonic L-428 was purchased for portrait and wedding work. It came with the Lumi-sphere, the Lumi-disc, and the reflected metering disc. While the Luna Pro with the incident dome worked well for portraits, as I tried to improve my portraits by using more precise lighting ratios using this meter with the Lumi-disc was the answer. The disc was more directional than the dome and let me grow as I needed. If I had understood the spot meter back then I could have done the same thing with the spot meter, but this solution was perfect for me at the time.
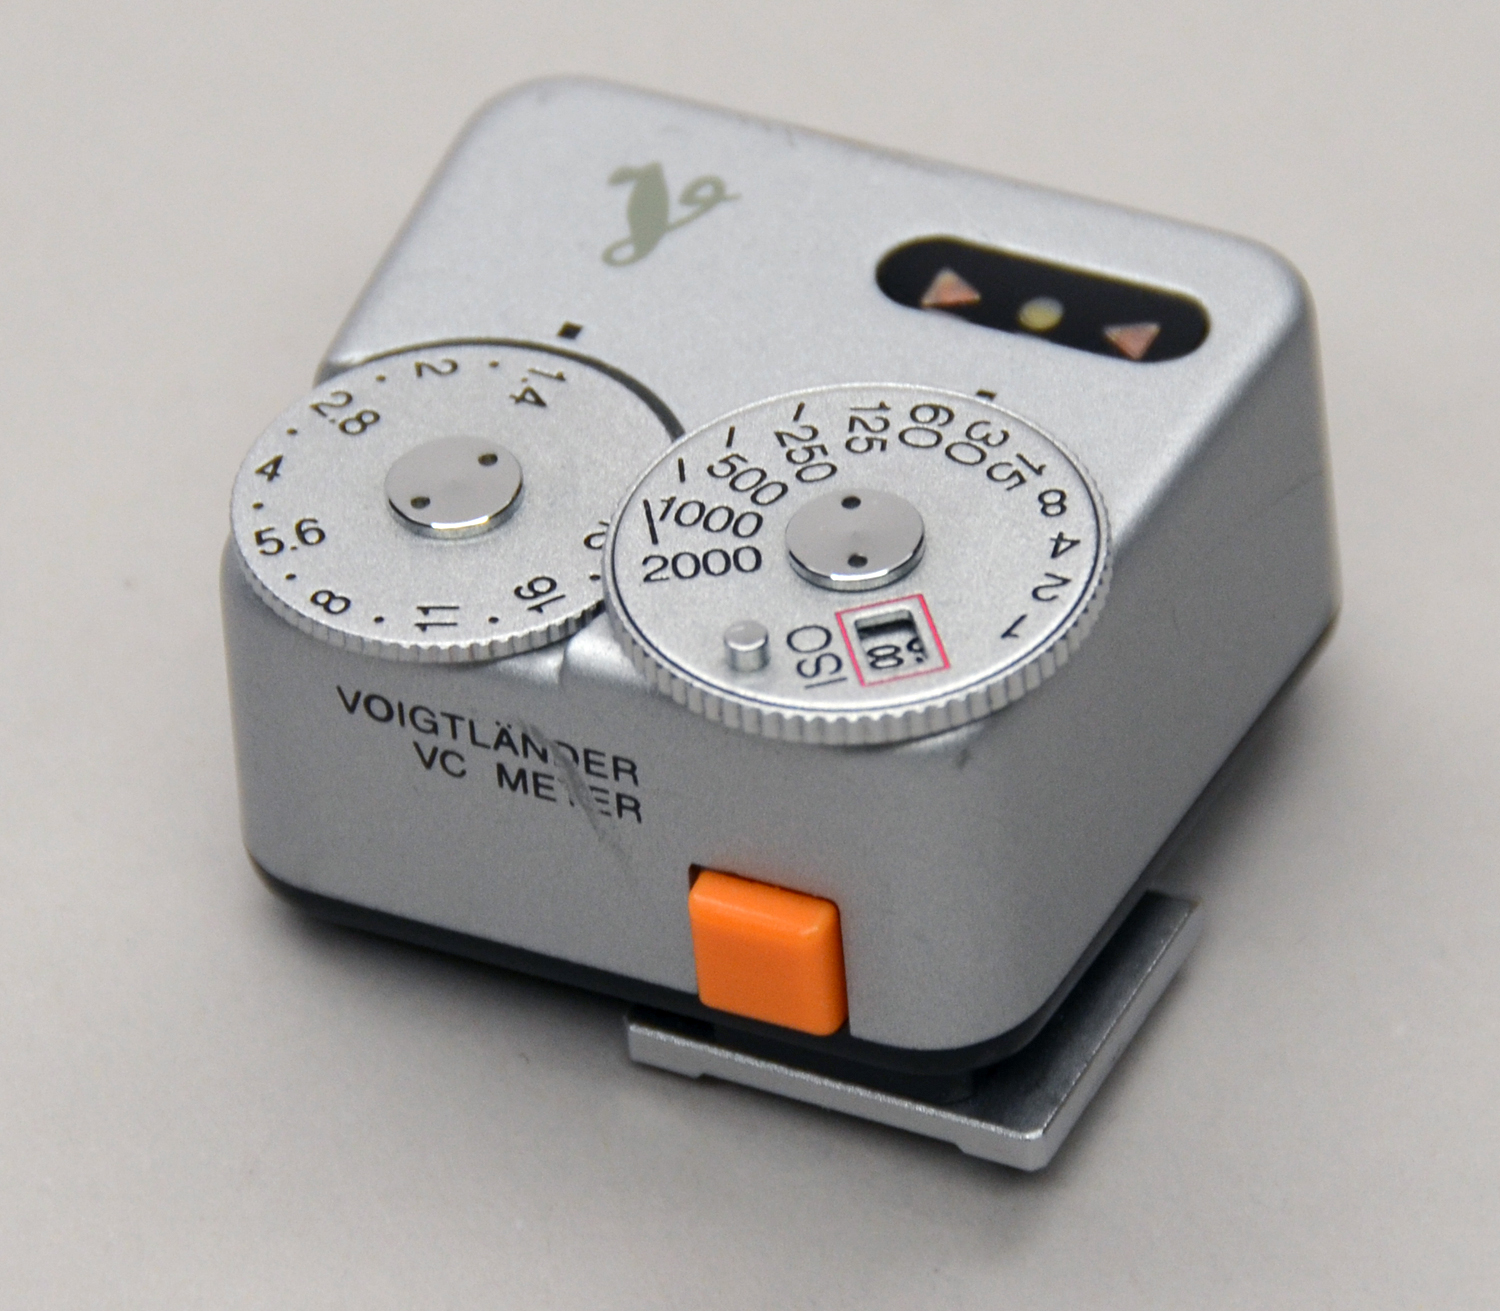
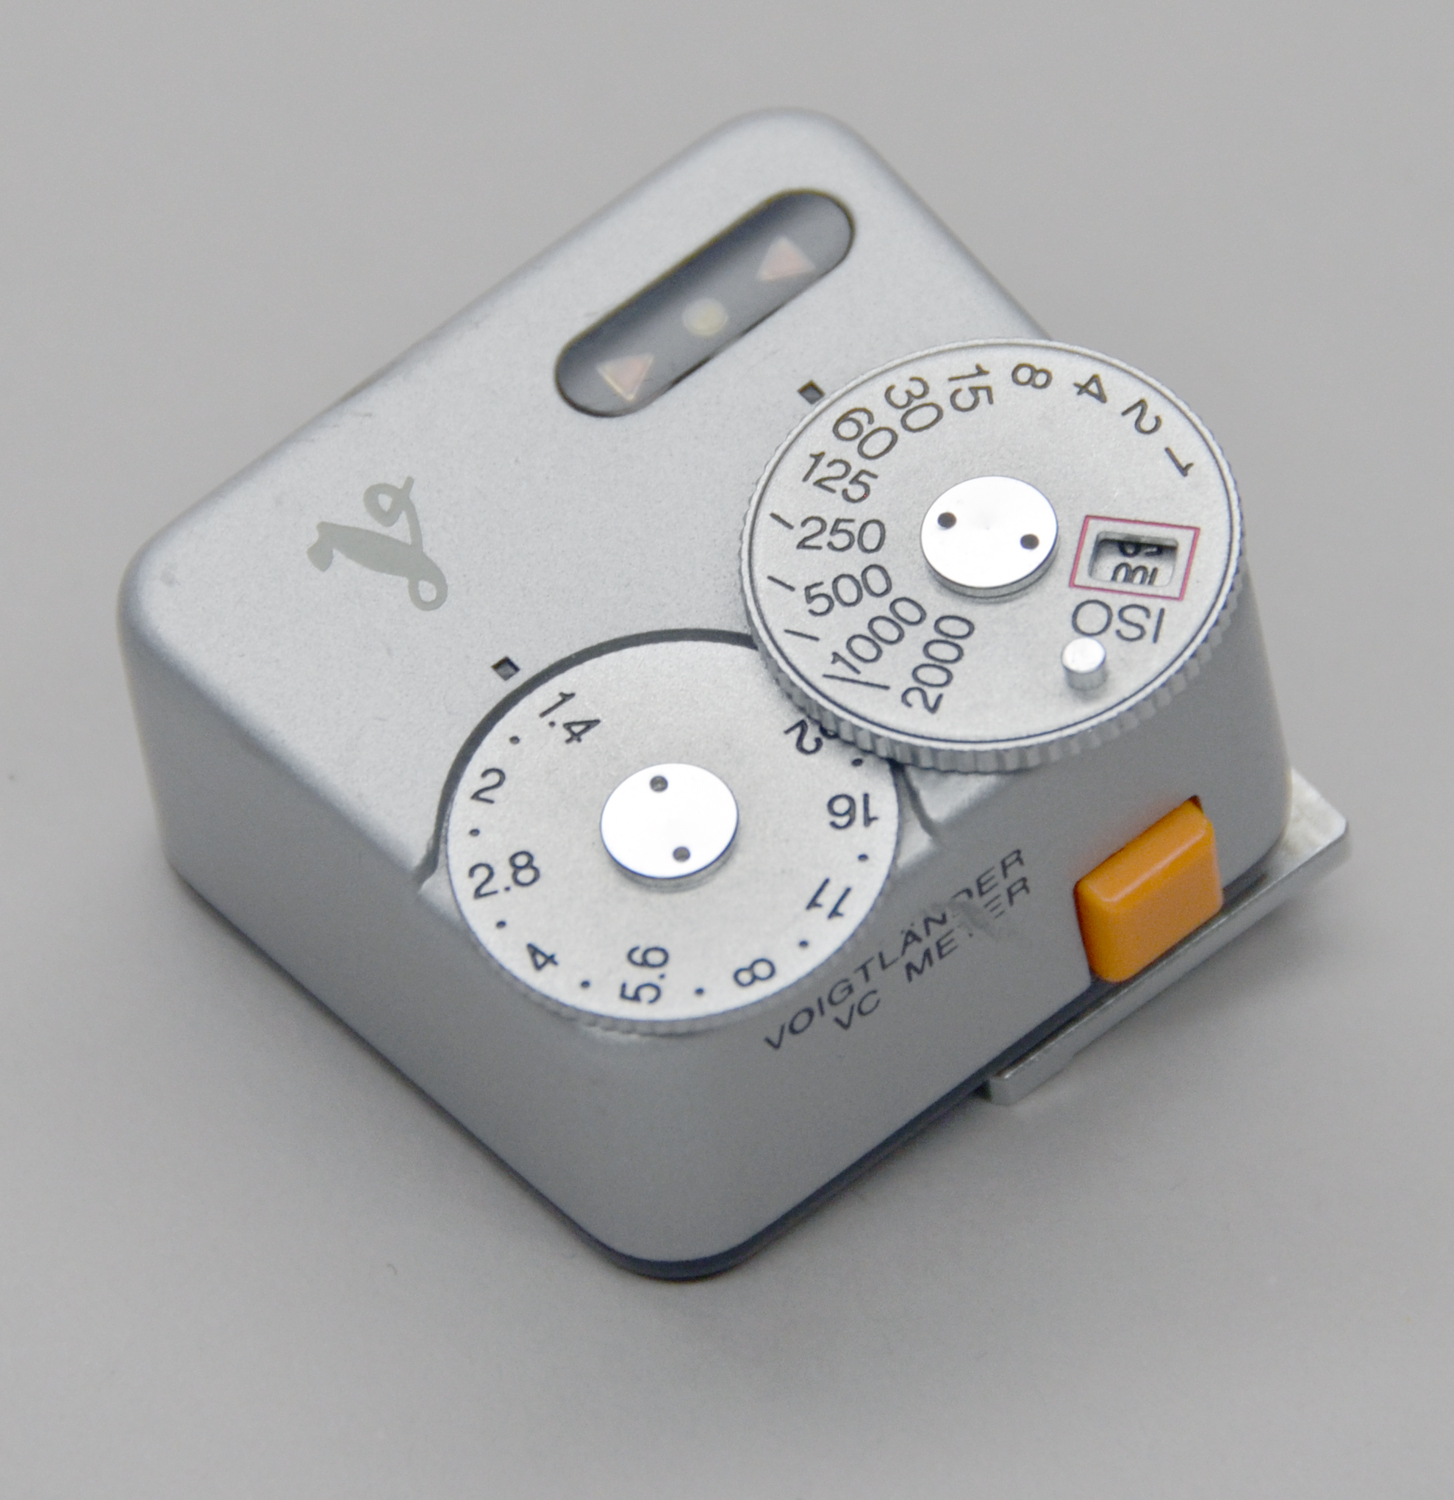
Voightlander VC Shoe Mount Light Meter
 |
 |
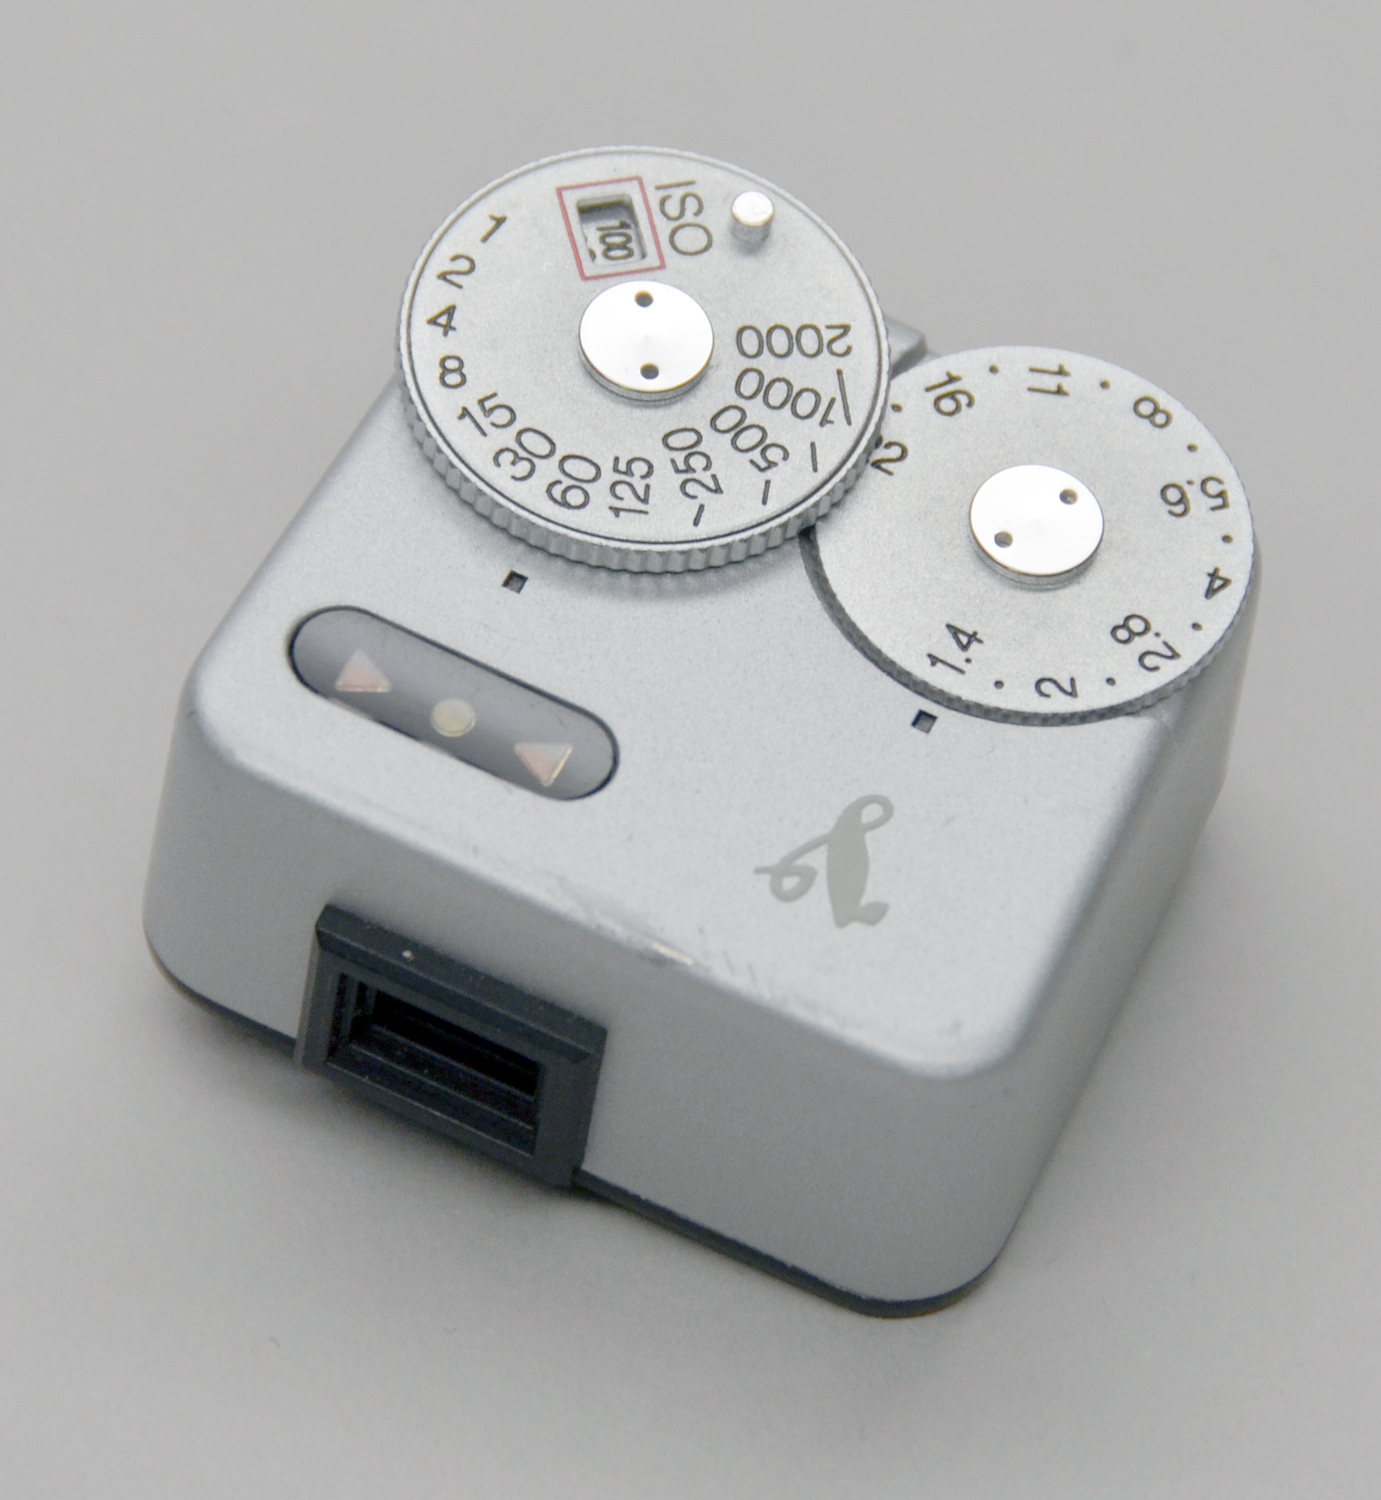 |
I use this light meter for my Leica rangefinders, and my Two Fourths 617 camera. It is light weight, and very accurate. The led lights make it quick to use. The meters are a little expensive, but I am glad I have it.