Galleries:
The Ancient Ones
Water
Nature's Treasures
Human Impact
Panoramas
Never Forget
Magic Maysville
Photo Journalism
Articles:
My Bomm Camera
My Darkroom
Test Print / Safelight Test
Why I Shoot Film
Zone System
Thoughts
Small
Format Zone System
Craig Pindell Photographer
An Emulsive.org Interview
In my darkroom
#01: Craig Pindell
Do you
want to create a darkroom but have no idea where to start? Perhaps
you’re a little confused by all of the options, or conflicting accounts
of “what’s best”. Maybe, just maybe, you’re like me: you have a basic
idea of what you’d like to create but have little in the way of real
direction to help guide your decision-making process.
Well, be
confused no more…or at the very least, be a little a little less
confused. Help is at hand!
In My
Darkroom is a new series which takes a look at
the darkrooms of photographers through the lens of their objectives and
needs. In this series, you’ll be able to learn how real photographers
have created, configured and tweaked their darkrooms to best suit their
processes and workflows.
Like the
EMULSIVE
interviews, these articles take a fixed approach to the questions
asked. This creates a consistency that allows you, the reader, to
compare, contrast the requirements that define each of the darkrooms you
will see here.
There
really is no catch-all darkroom solution and I hope that through these
articles, those of you out there thinking about creating or updating
darkrooms of your own, will be suitably inspired by the people on these
pages.
Kicking
off the series is the one and only
Craig Pindell.
Over to
you, Craig.
~ EMULSIVE
Emulsive: How long have you had your darkroom? Where is it and
what do/can you develop or print there?
CP:
Just short of 25 years. It is in the basement of our home and I use it
to develop and print: 8×10, B&W and C-41 film, 5×7 B&W, 4×5 B&W and
C-41, 120 roll Film B&W and C-41 and B&W (up to 6×17)!
Emulsive: What equipment and/or facilities do you have
installed?
CP: Two enlargers, two sinks, a print inspection area and many, many
timers, to name a few!
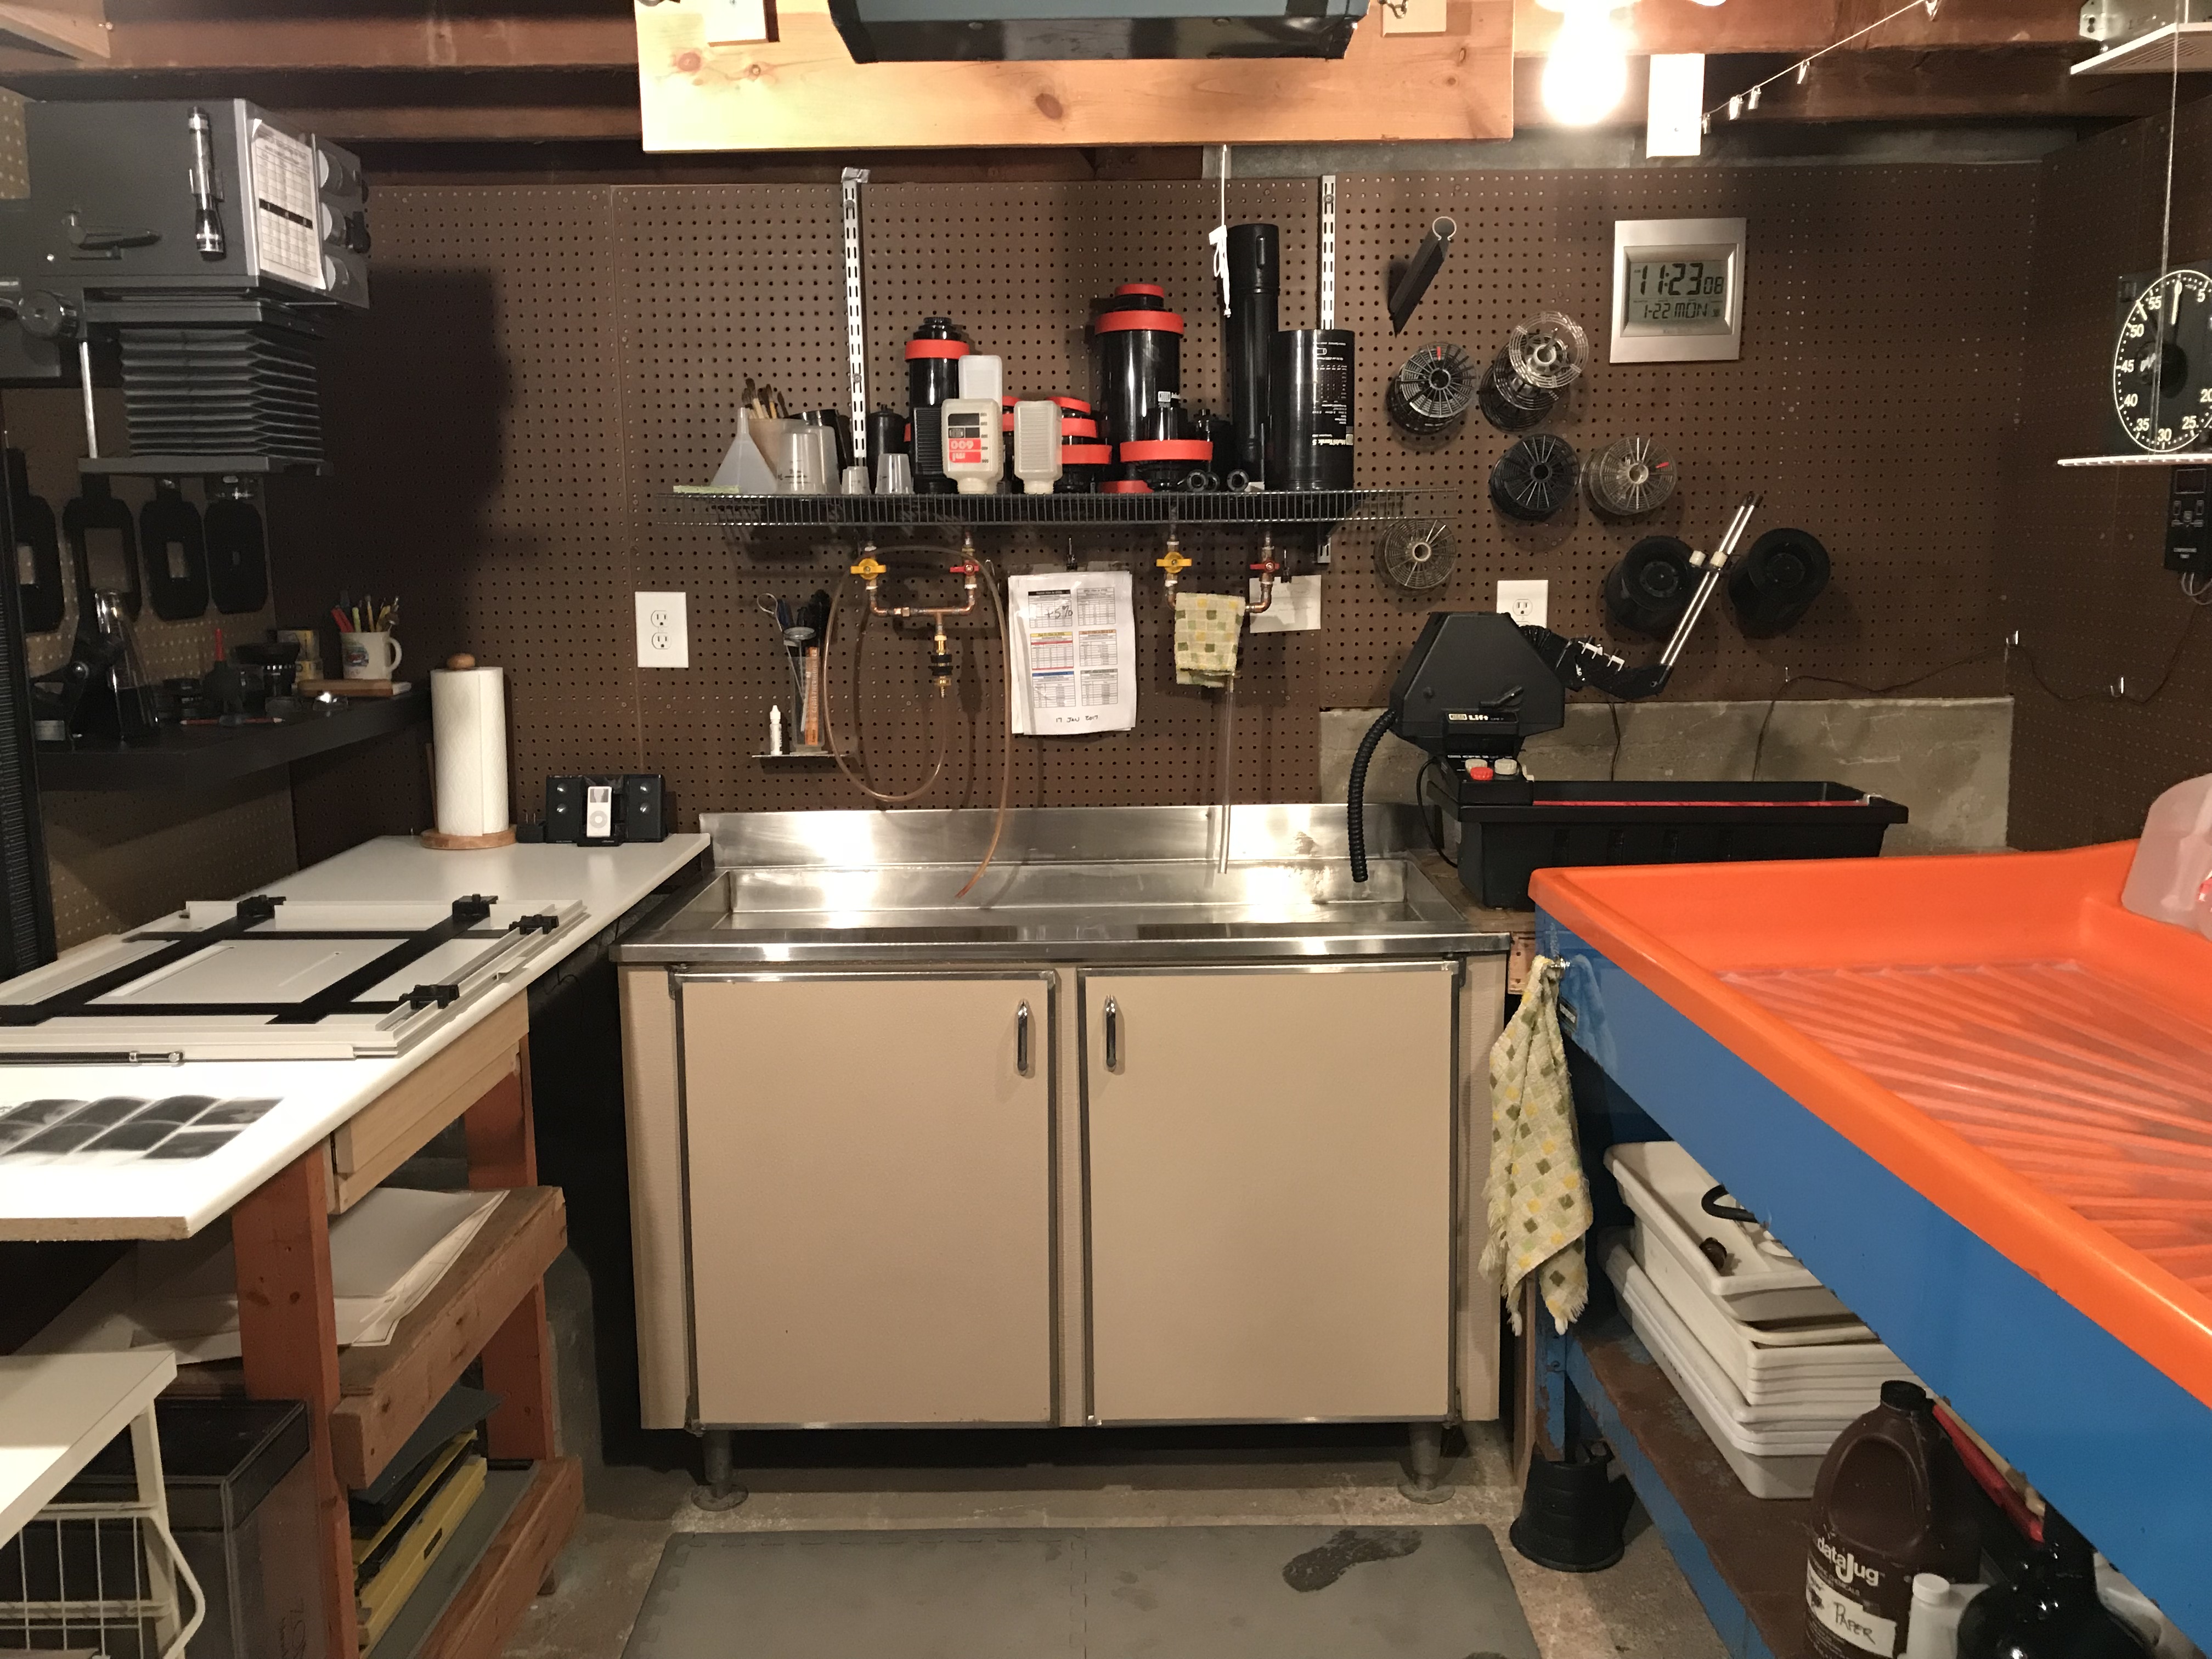
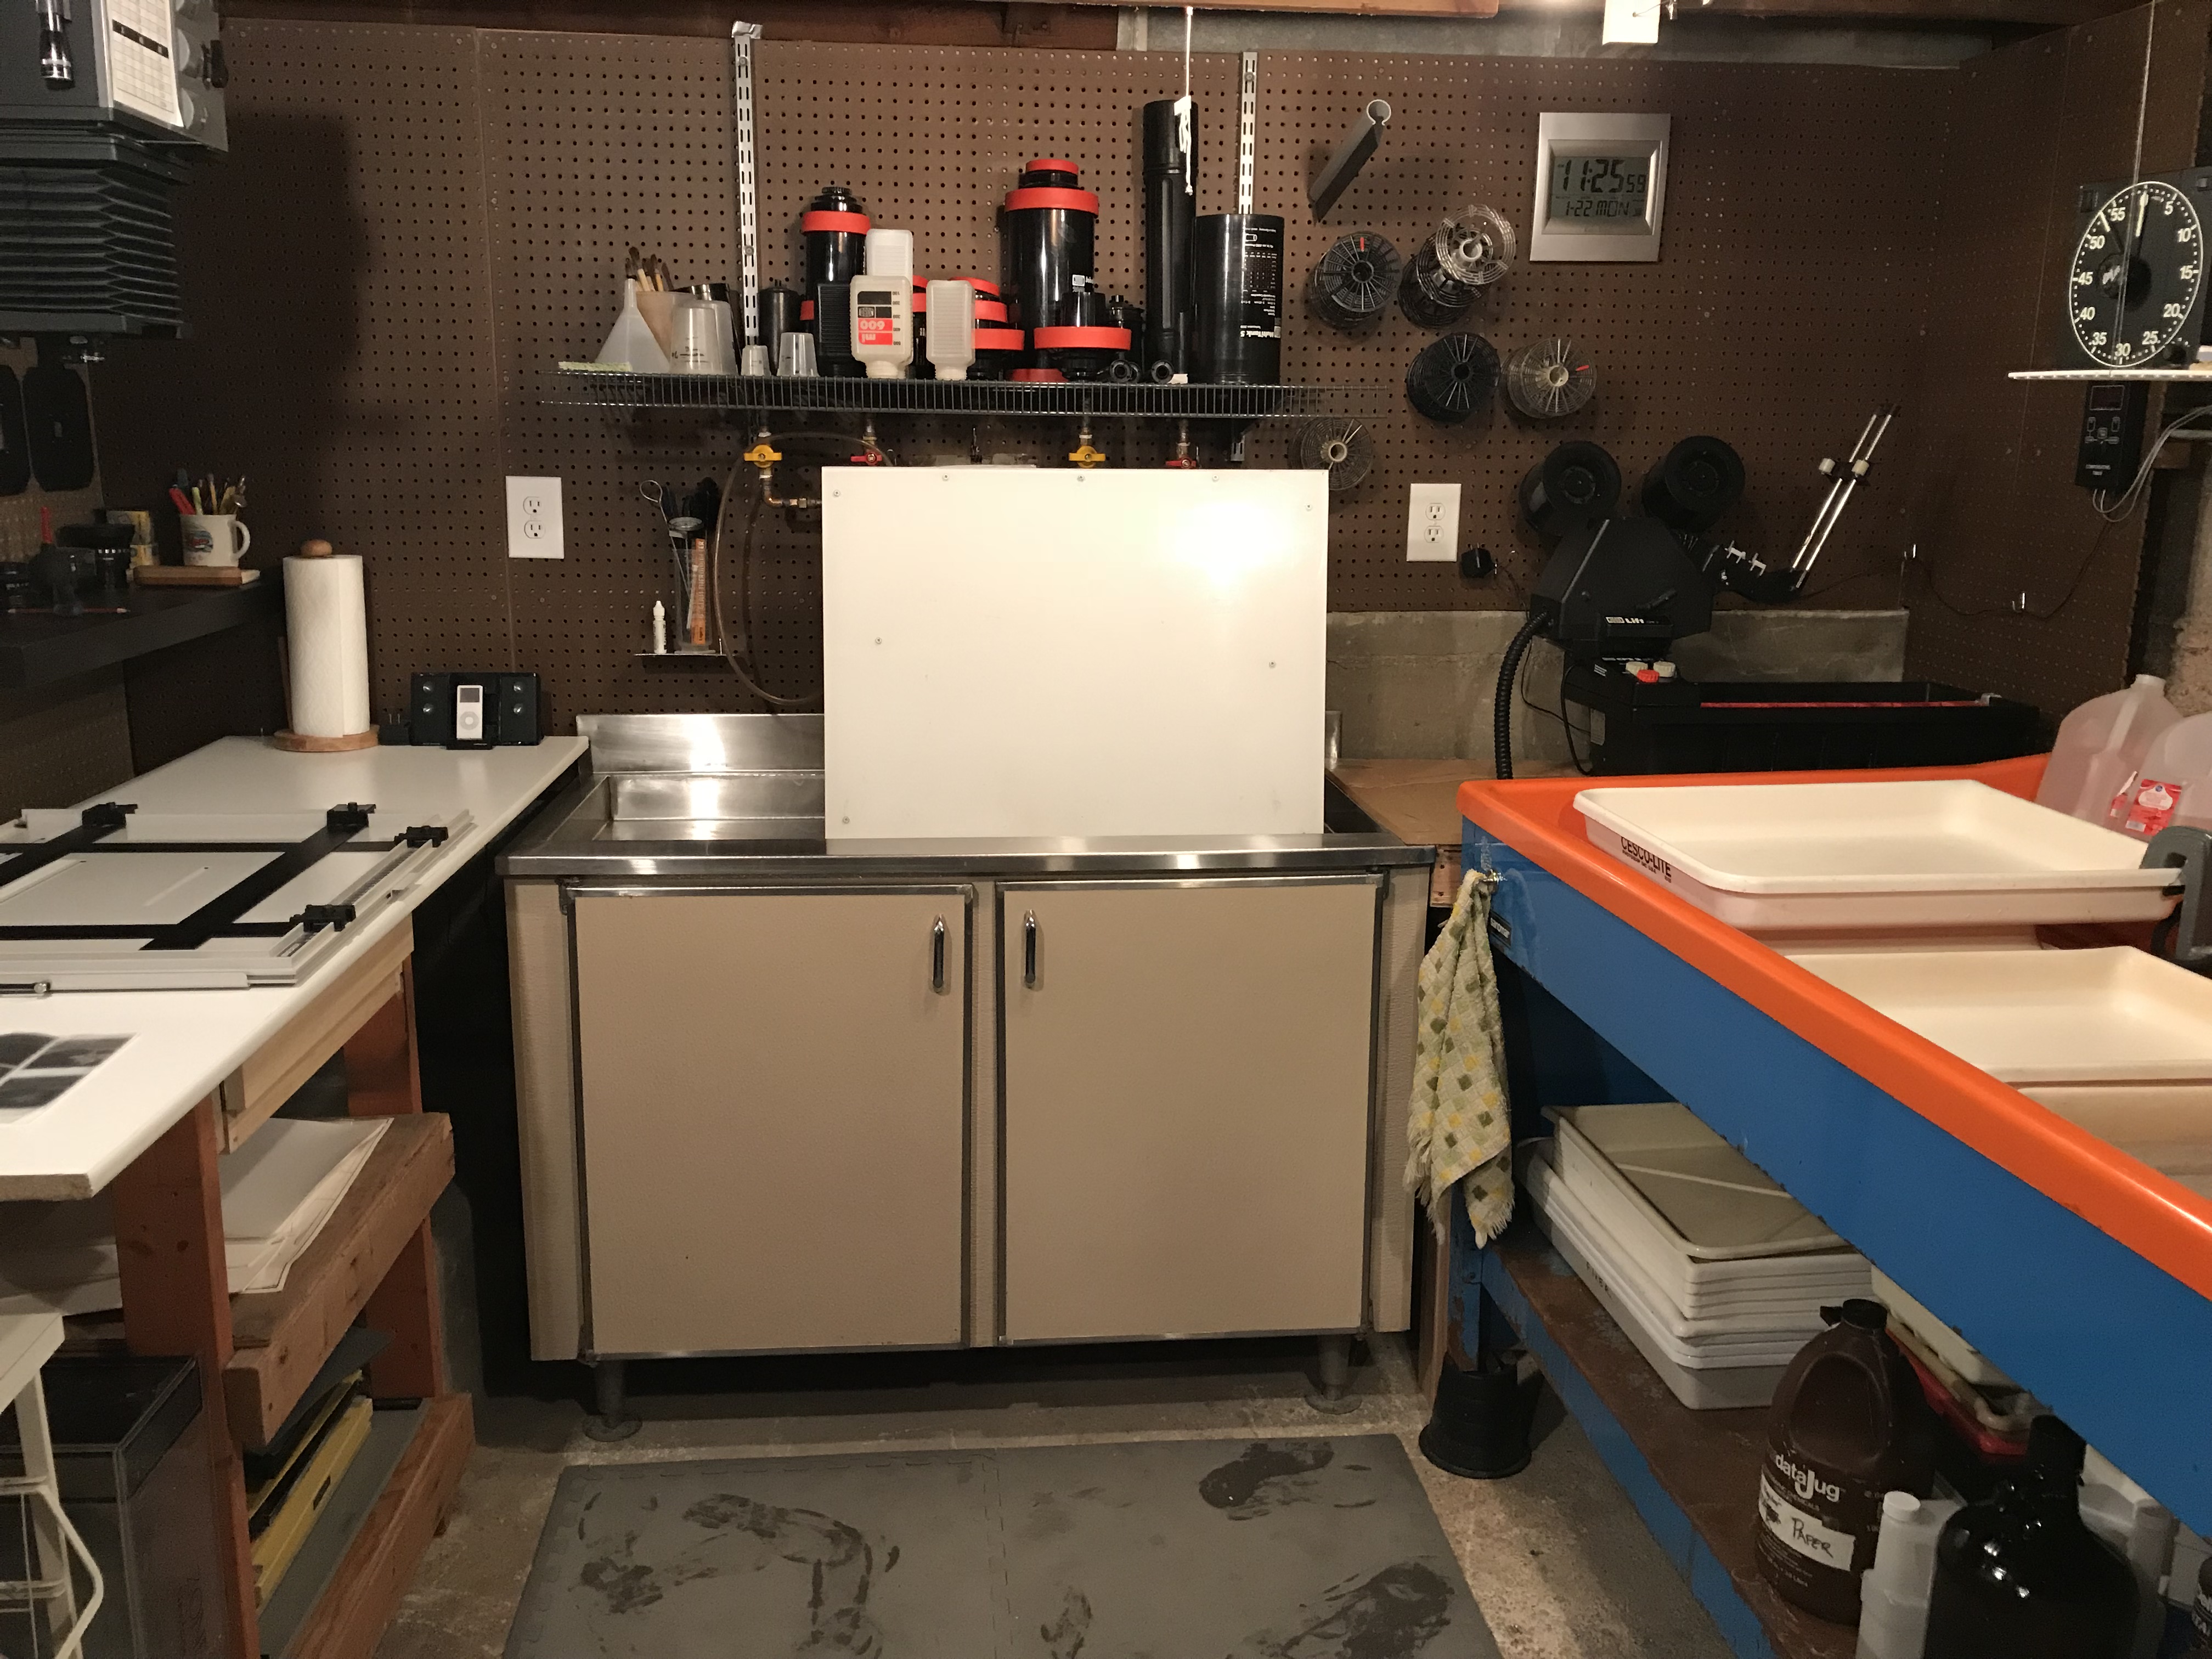
The picture above shows my darkroom set up for film development. You can
see my second (smaller, metal) sink front and center, with my Jobo
processor to the right of it. My enlarger/printing area is on the left
and my print washing area/sink is to the right. Further down, you’ll see
this arrangement converted to a print inspection area.
I found a padded waterproof floor covering material at a dollar store
and bought enough for my darkroom for $15 US. It is closed cell foam and
really makes your feet, ankles, and knees happy during long days in the
dark!
As it is a one-person work area, this darkroom configuration works for
me because I do not develop film and make prints at the same time.
Emulsive: Developing film and prints
CP: I have two sinks; one is metal, 2 1/2 feet by 4 feet, and used
mostly for film processing. Each sink has two water faucets and each
faucet has temperature-controlled water on the right handle, and hot
water on the left handle.
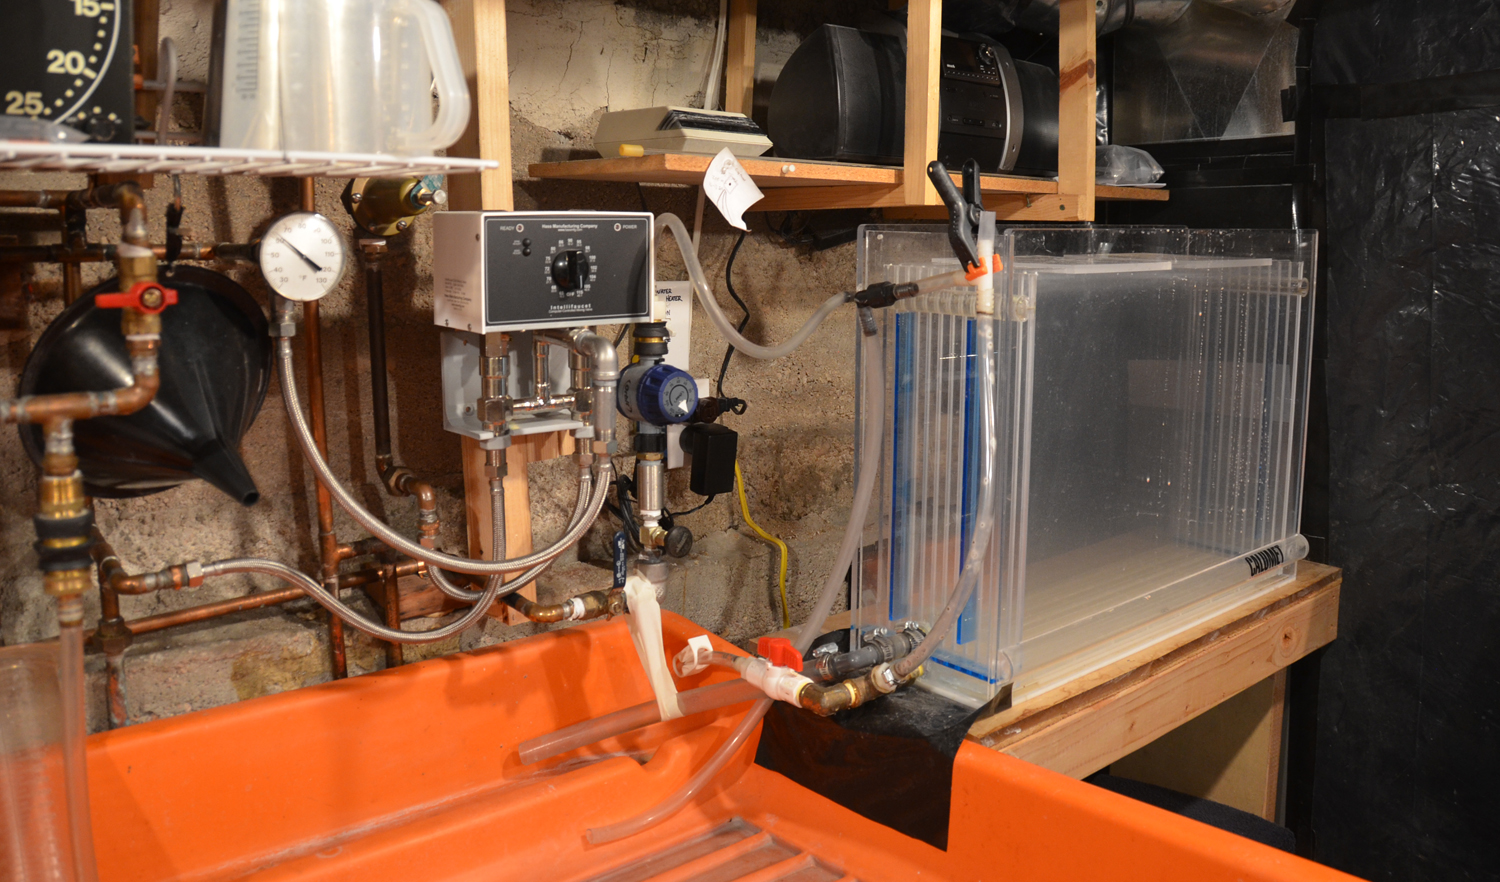
I use a secondhand temperature control valve for the tempered water in
the darkroom, as well as a dedicated 6-gallon electric hot water heater.
You might ask why go to the trouble but the answer is simple: any change
in water pressure in the house does not affect the water in the
darkroom, and most importantly, processing color does not leave Mrs
Pindell without hot water!
All of my film is processed in a Jobo CPE2 Plus with a Jobo lift. For
film processing, I use an old school GraLab timer, which is black and
has glow in the dark numbers. (I made a cover from a sheet of black
plastic that covers the timer when I am loading or unloading film.)
The second, larger sink (below) is just large enough to fit three 20×24
trays side-by-side. This sink is for processing prints.
For print development, I use a Zone VI compensating timer. It is a
digital timer that beeps every 30 seconds and can adjust the rate for
temperature variations of the developer.
The 16×20 archival washer on the right of the image above has its own
control valve, which has a garden hose timer adapted to limit wash time
and save water. This washer is used for sheet film and prints. All my
roll film is washed in a Calumet archival washer, sized for the Jobo
rolls. This print washer has been an awesome addition to the darkroom. I
made some plumbing modifications so that it does not drain when washing
is completed.
I also adapted a timer from the garden store so that I can put prints in
the washer and walk away, knowing that when the wash time is complete,
the prints will be waiting for me to come back when I can to squeegee
them and put them on the drying rack.
This saves a lot of water and frees me up for other things.
Making prints
I have two enlargers. My 8×10 enlarger is a Durst Dichroic, which I use
for 8×10, 5×7, and 6×17 printing. The timer for the Durst is also a
Durst that came with the enlarger. My 4×5 enlarger (below) is a Saunders
LPL with a Dichroic color module. The timer for the Saunders is a Jobo
digital.
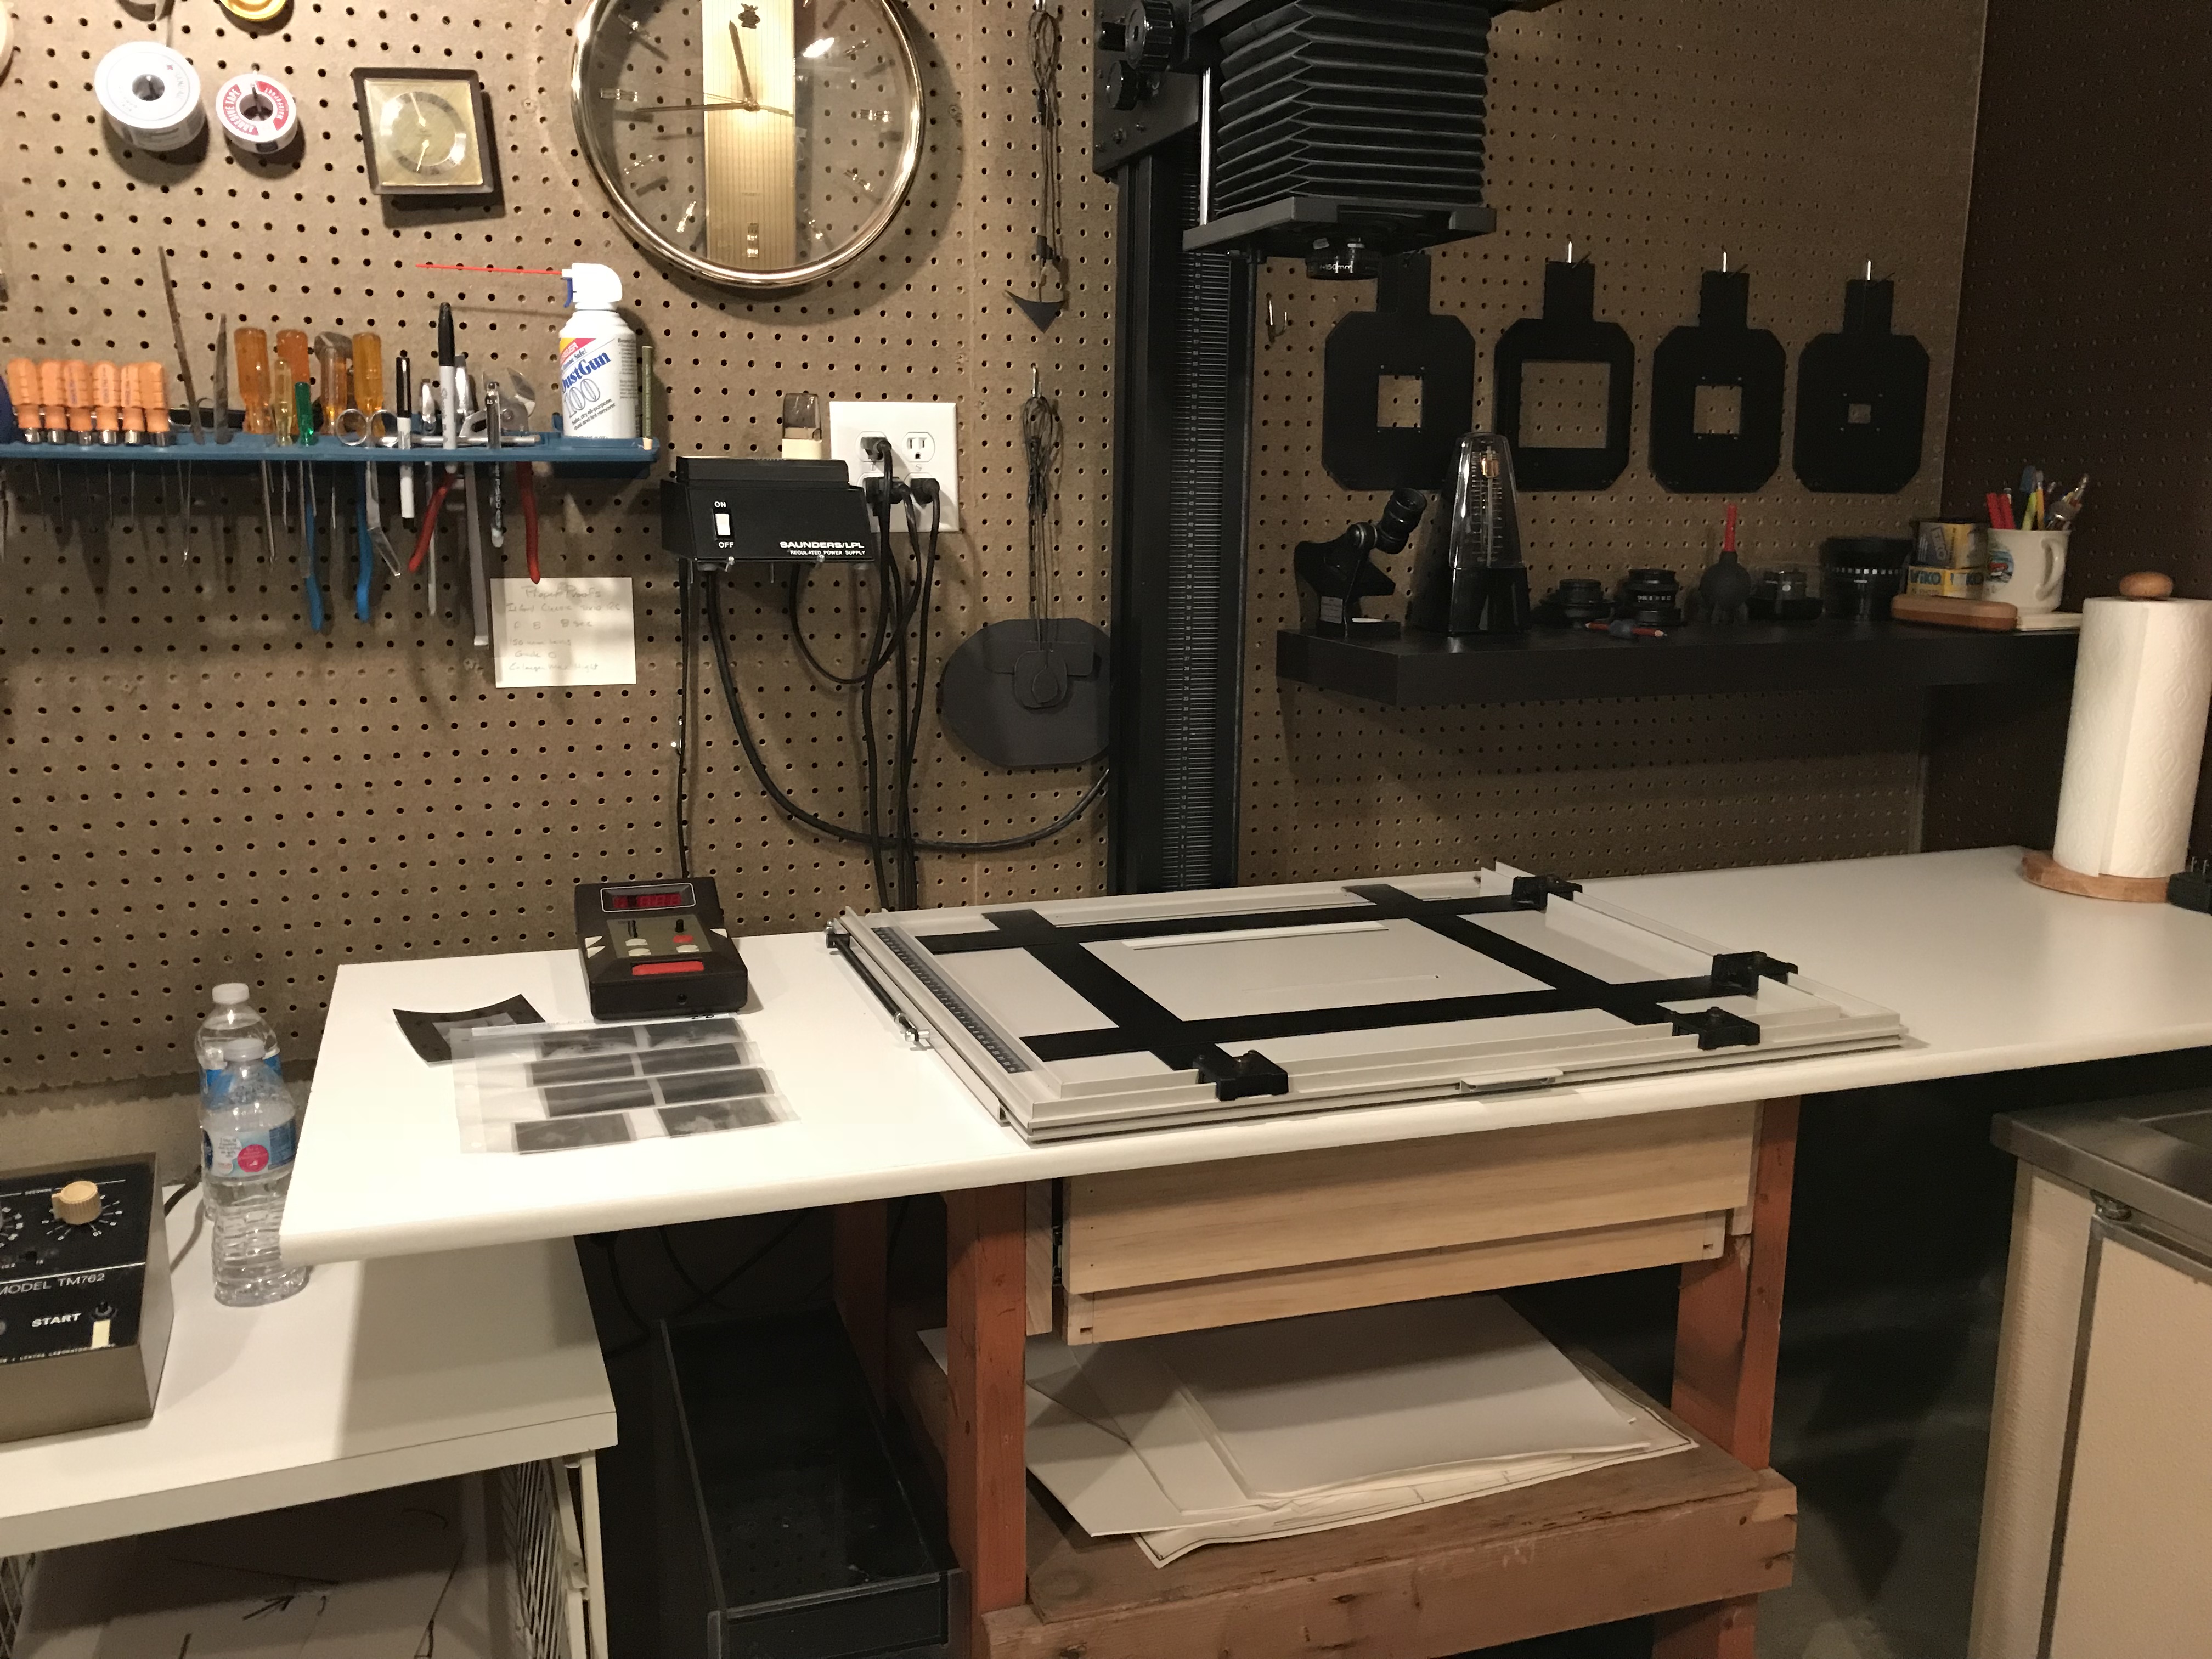
The drawer below the enlarger is a light-safe drawer based on a drawing
from John Sexton. This has to be one of the most efficiency improving
additions to my darkroom. It was not expensive to build and I finished
it in an afternoon.
Having the negative carriers, lenses, dodging tools and grain focuser
close to the work area is a huge improvement for me as well.
I can’t talk about printing without talking about paper, specifically
how it’s stored. The image below is my paper storage area. Having the
paper sorted by size and properly stored helps me to know when I am
running short on a particular size of a particular paper.
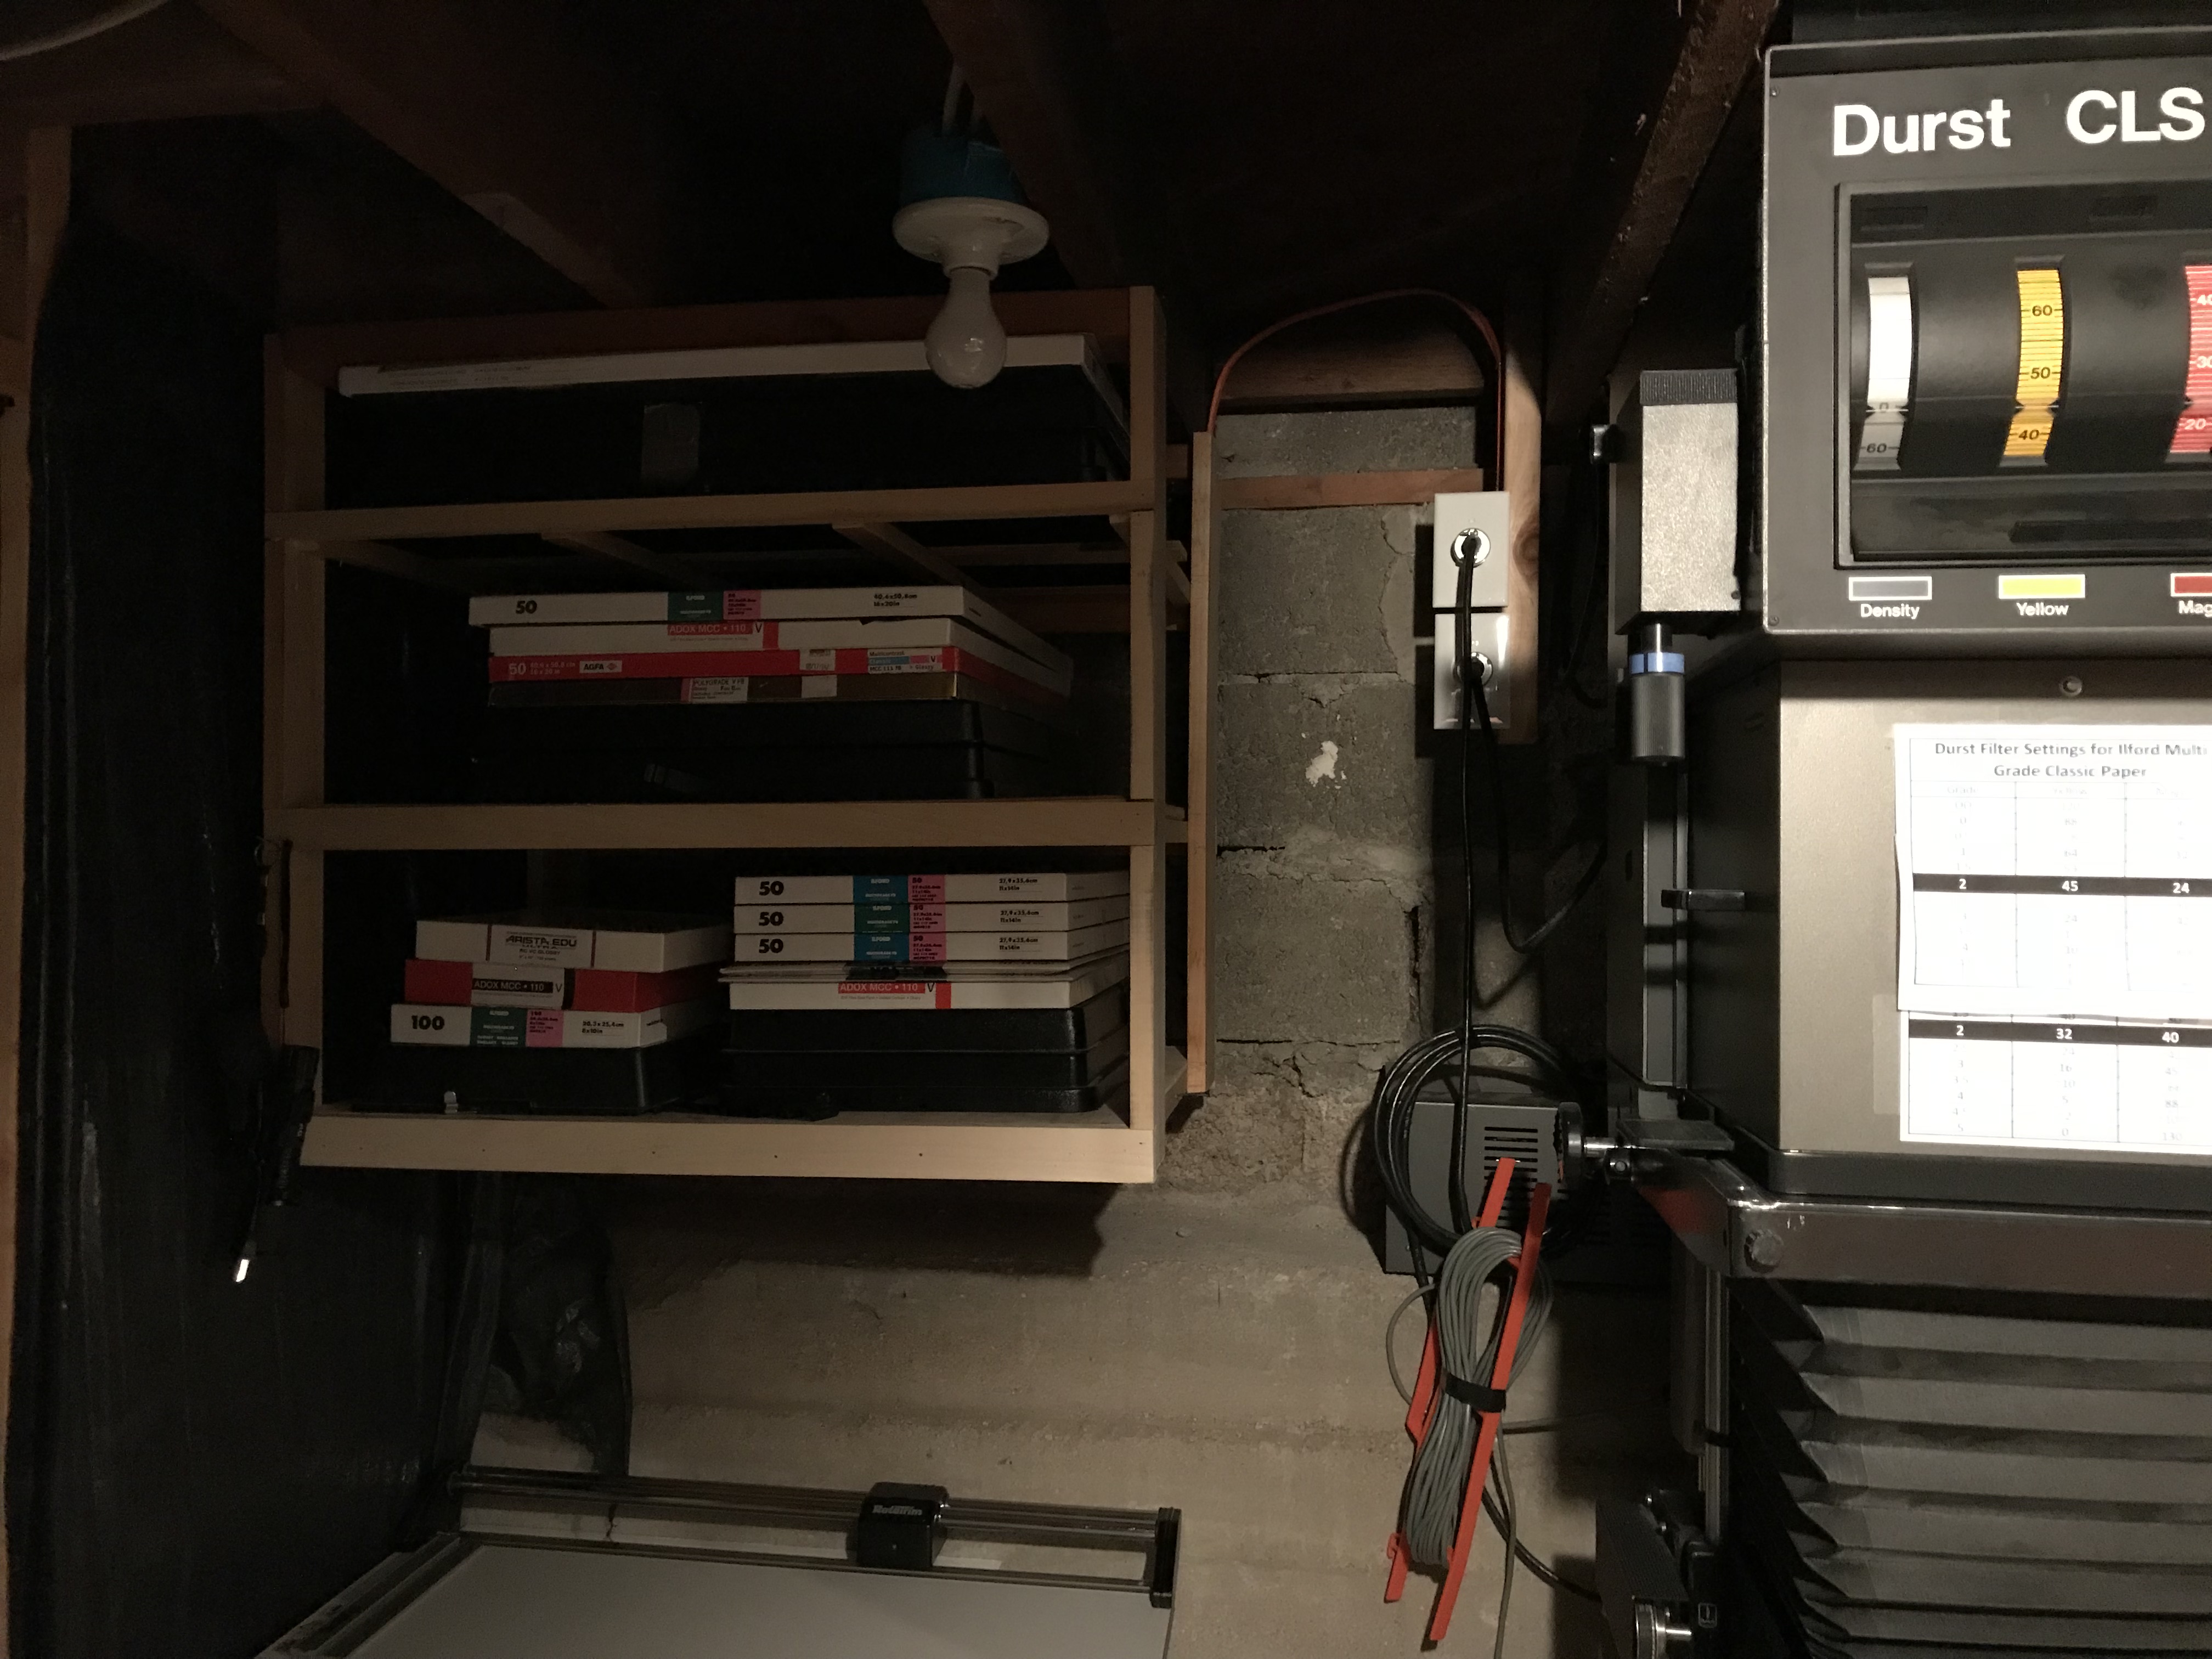
I find this set-up really helps if I am not able to print for extended
times, due to work or whatever, and want to catch up with marathon
printing sessions. Living so far from a source for paper, the lead time
can be quite an issue.
In short stockpiling helps!
Print inspection
The most important area of my darkroom is my wet print inspection area
(see below). Prints have a tendency to appear a bit darker when dry than
when wet. To account for this, I need to be able to evaluate a wet print
with confidence. To put it another way, I need to know how it will look
when dry.
My inspection area is essentially is a 28×30″ sheet of white plexiglass
on an easel I built, which sits in my film sink. The light for the area
is a simple 25-watt bare bulb above the easel (you can just about make
out the pull-cord for the light at the top of the picture below).
In my case it took a bit of trial and error to find the correct wattage
bulb for my new arrangement. I settled on 25-watts by following a bit of
a process:
I start off by making the best print I can of
a known negative (I usually use my Stairway in the Lighthouse photo) and
follow my process for creating that print completely – including
selenium toning – using the wattage bulb I
think is
correct.
After the print dries, I compare it to my favorite print of that
negative in an area that is lighted similar to gallery lighting. If the
two prints match, the inspection light wattage is correct. If the test
print is too dark, I reduce the wattage of the inspection light. If the
print is too light I increase the wattage of the inspection light. I
then repeat the test.
Fortunately, once I have determined the correct wattage, testing is over
until I change the configuration!
In the past, even changing bulbs – as long as the wattage is the same –
provides consistent results. I prefer a bare frosted bulb with no shade.
In the current darkroom configuration, the inspection light is switched
on and off with a pull string, that has a bit of glow in the dark tape
on the end.
Emulsive: How do you see your darkroom changing over the coming
months and years?
CP:
Right now it is about right, I think. I just remodeled, so I
think I have it right…for now…
Emulsive: What advice would you give to someone creating their
own darkroom today?
CP:
Decide what the largest print you will be making, choose or build
a sink to fit that size, then arrange everything else around that.
Do not convince yourself that your darkroom has to be perfect to start.
The more you work in your darkroom, in a way that makes sense to you,
the better idea you will have what is important to you.
Mostly, sort out how you will be viewing wet prints to best judge how
your work will look to others!
One final but very important point – be sure your sink is tall enough
that hours of standing over the trays do not cause back pain. It takes a
toll over time, and darkroom work should be fun!
~ Craig Pindell